My kitchen pantry and I have had a rocky relationship since we moved into our current house, almost three years ago. While I have plentiful cabinet space, the pantry is small. I let it get messy, purge and organize, and then I overload it with new groceries and let it get messy again. Not only does a messy pantry make me feel disorganized, it makes grocery shopping inefficient and wasteful. Countless times I returned home from the grocery store with boxes of crackers and bags of chips for the kids only to find half eaten, stale packages of the same items in my pantry! I know! Stop the madness! Ok the chips were for me. 🙂
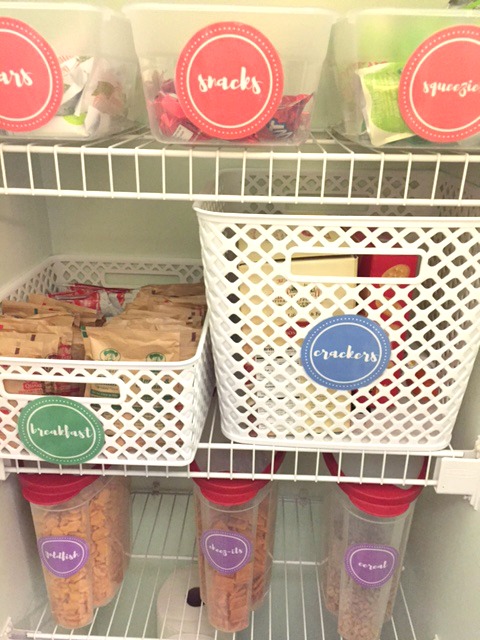
Anyway, I knew I had to do something. It was hard to justify spending a lot of money in a part of the house that doesn’t need to look like it’s on display. Especially when so many other parts of our home could use some love. So I didn’t. I spent about $30 and got a pantry that I don’t mind looking at when someone leaves the door open. And an unexpected, though very welcome result is that it helps me save money at the grocery store! I stopped buying so many different types of snacks in favor of keeping it simple with the basics so that I don’t overflow my pretty pantry with clutter. I still have all the snacks on hand that the kids ask for, as well as the staples I need to make our favorite meals, just not all the extra bags of half eaten chips and opened but never finished boxes of crackers.
Here are some things I learned that will make tackling this project easier for you:
- Find a new space for the cans and jars.
My pantry is small, so something that really helped me save room was to remove all the cans and jars, and put them in their own cupboard. Just some quick rearranging made this possible and it saved me so much space in the pantry. It also got the heavy items out of the way so I didn’t need to worry about the kids reaching for a snack and dropping a jar of pasta sauce on their toes!
2. Plan out what you need to buy before you head to the store!
I pulled everything out of my pantry and grouped it together on the counter to see what I needed before I went shopping. There’s nothing worse than thinking you know what you need until you’re standing in front of a wall of bins (similar here and here) in the store and your mind goes blank. You’ll get overwhelmed at the choices and buy all the bins. I love all the bins but that’s not the point here.
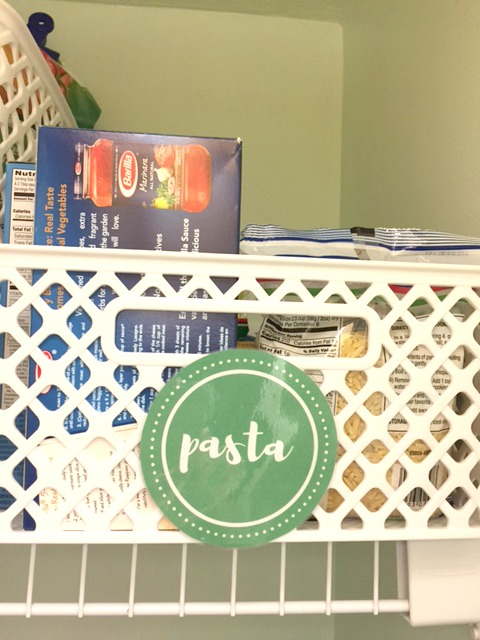
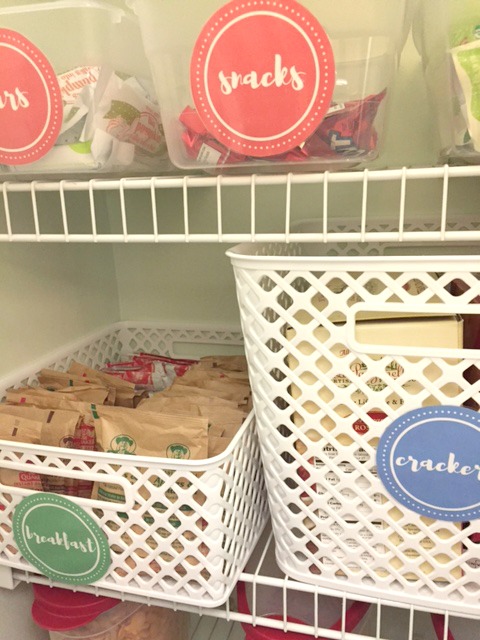
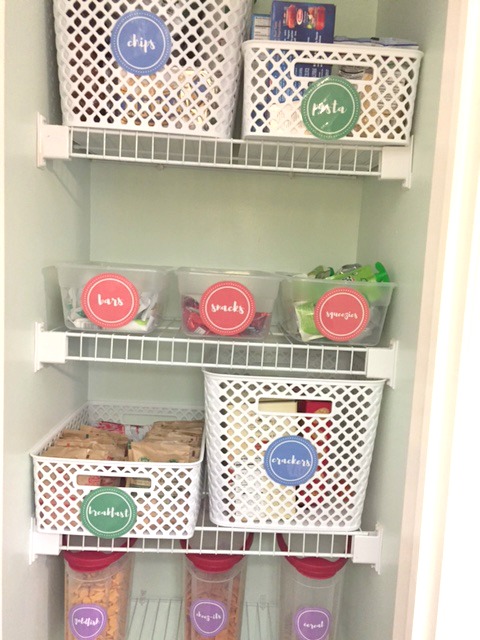
3. Keep categories broad so you have a place for everything.
We always have certain snacks like goldfish crackers on hand, so they got their own label. Other foods like hot chocolate mix, instant breakfast and oatmeal packets all go together in a bin labeled “breakfast”. We don’t always have boxed macaroni and cheese in the pantry, but we always have pasta, so the mac and cheese went in a bin labeled “pasta”. It seems obvious, right? It wasn’t when I was staring at a pile of food on my kitchen island!
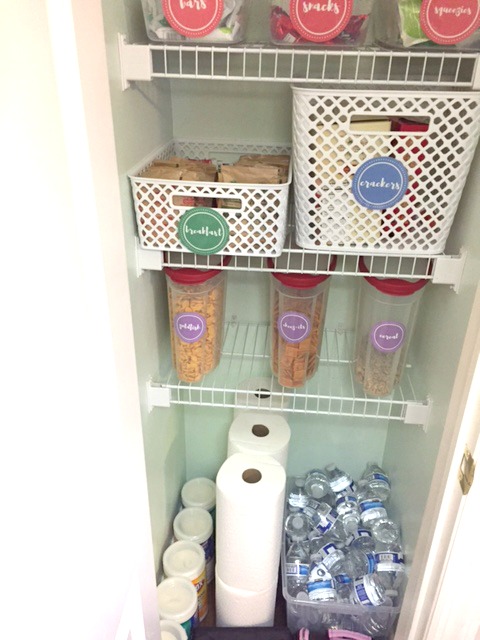 4. Label your bins.
This makes it easy to grab whatever you need in a blink and put things back where they go. Every time! I made labels in canva (it’s free!) and printed them on regular paper and then ran them through my laminator. I use this one with these laminating pouches. Then I just put some velcro dots on the back and stuck them in place. The velcro dots are great because if I want to make changes, I just pop a different label onto a bin and store it for later!
I hope these tips inspire you to makeover your pantry! As a bonus, I’m sharing my printable labels with you! Enjoy and happy organizing!
this post uses affiliate links