I had a client that was looking to add farmhouse curb appeal and needed a new address sign. I searched Pinterest and came across this sign from Wit and Wander. I liked it so much I decided to modify it for my client. I got out my measuring tape and adjusted the size requirements of the board. Then I went to the hardware store and learned how to attach my address sign to brick. I chose a 20 in wide 1×12 poplar board. The reason I chose poplar over pine because it holds up nicer to the elements.
What you’ll need:
- Poplar board (20 in wide 1×12)
- Sanding block
- Wood conditioner
- Old lint free cloth
- Gloves
- Painter’s tape
- Matte black spray paint
- White graphite paper
- White acrylic paint
- Paint brush
- Spar Urethane (for outdoor use)
- Hardware to hang
- If attaching to brick use:
- Drill
- Washers (4)
- Screws (4)
- Anchors (4)
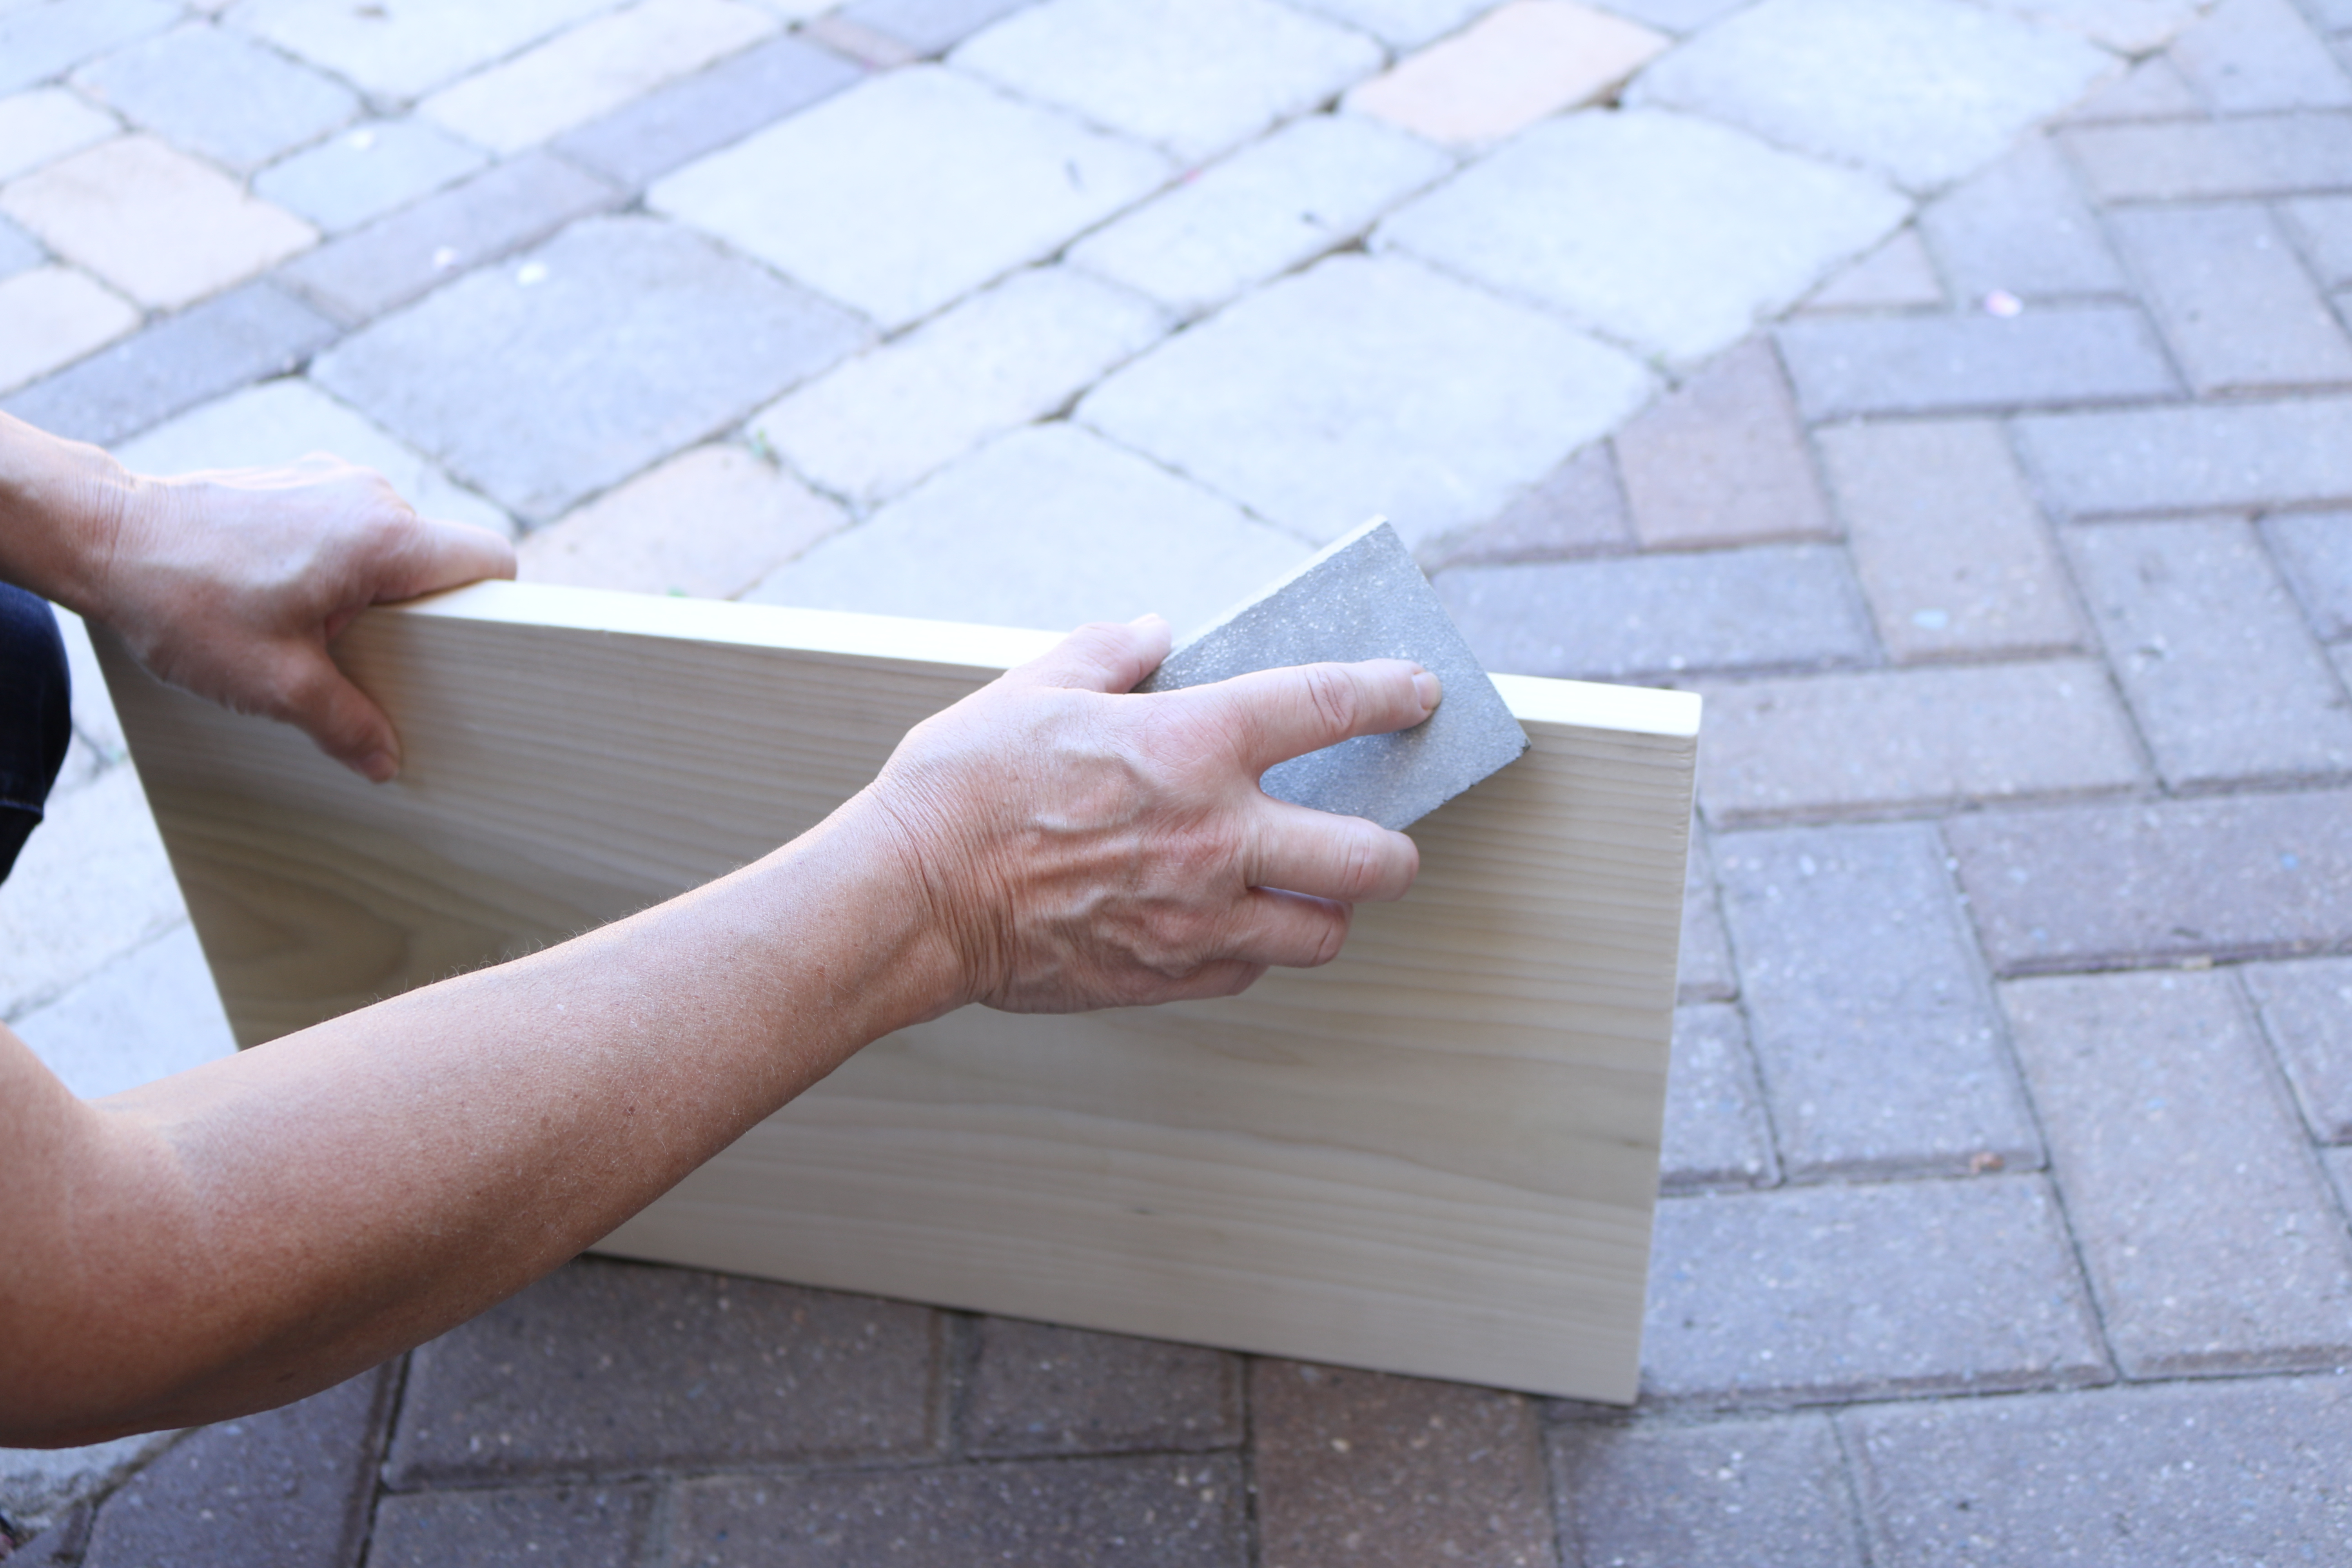
- Using a sanding block, lightly sand the board to get softer corners and smoother finish.

2. In a well ventilated area apply wood conditioner to all sides of the board with a cloth. Wood conditioner makes the stain go on smooth and more evenly. Wait approximately 10 minutes and wipe the board to remove any excess conditioner.
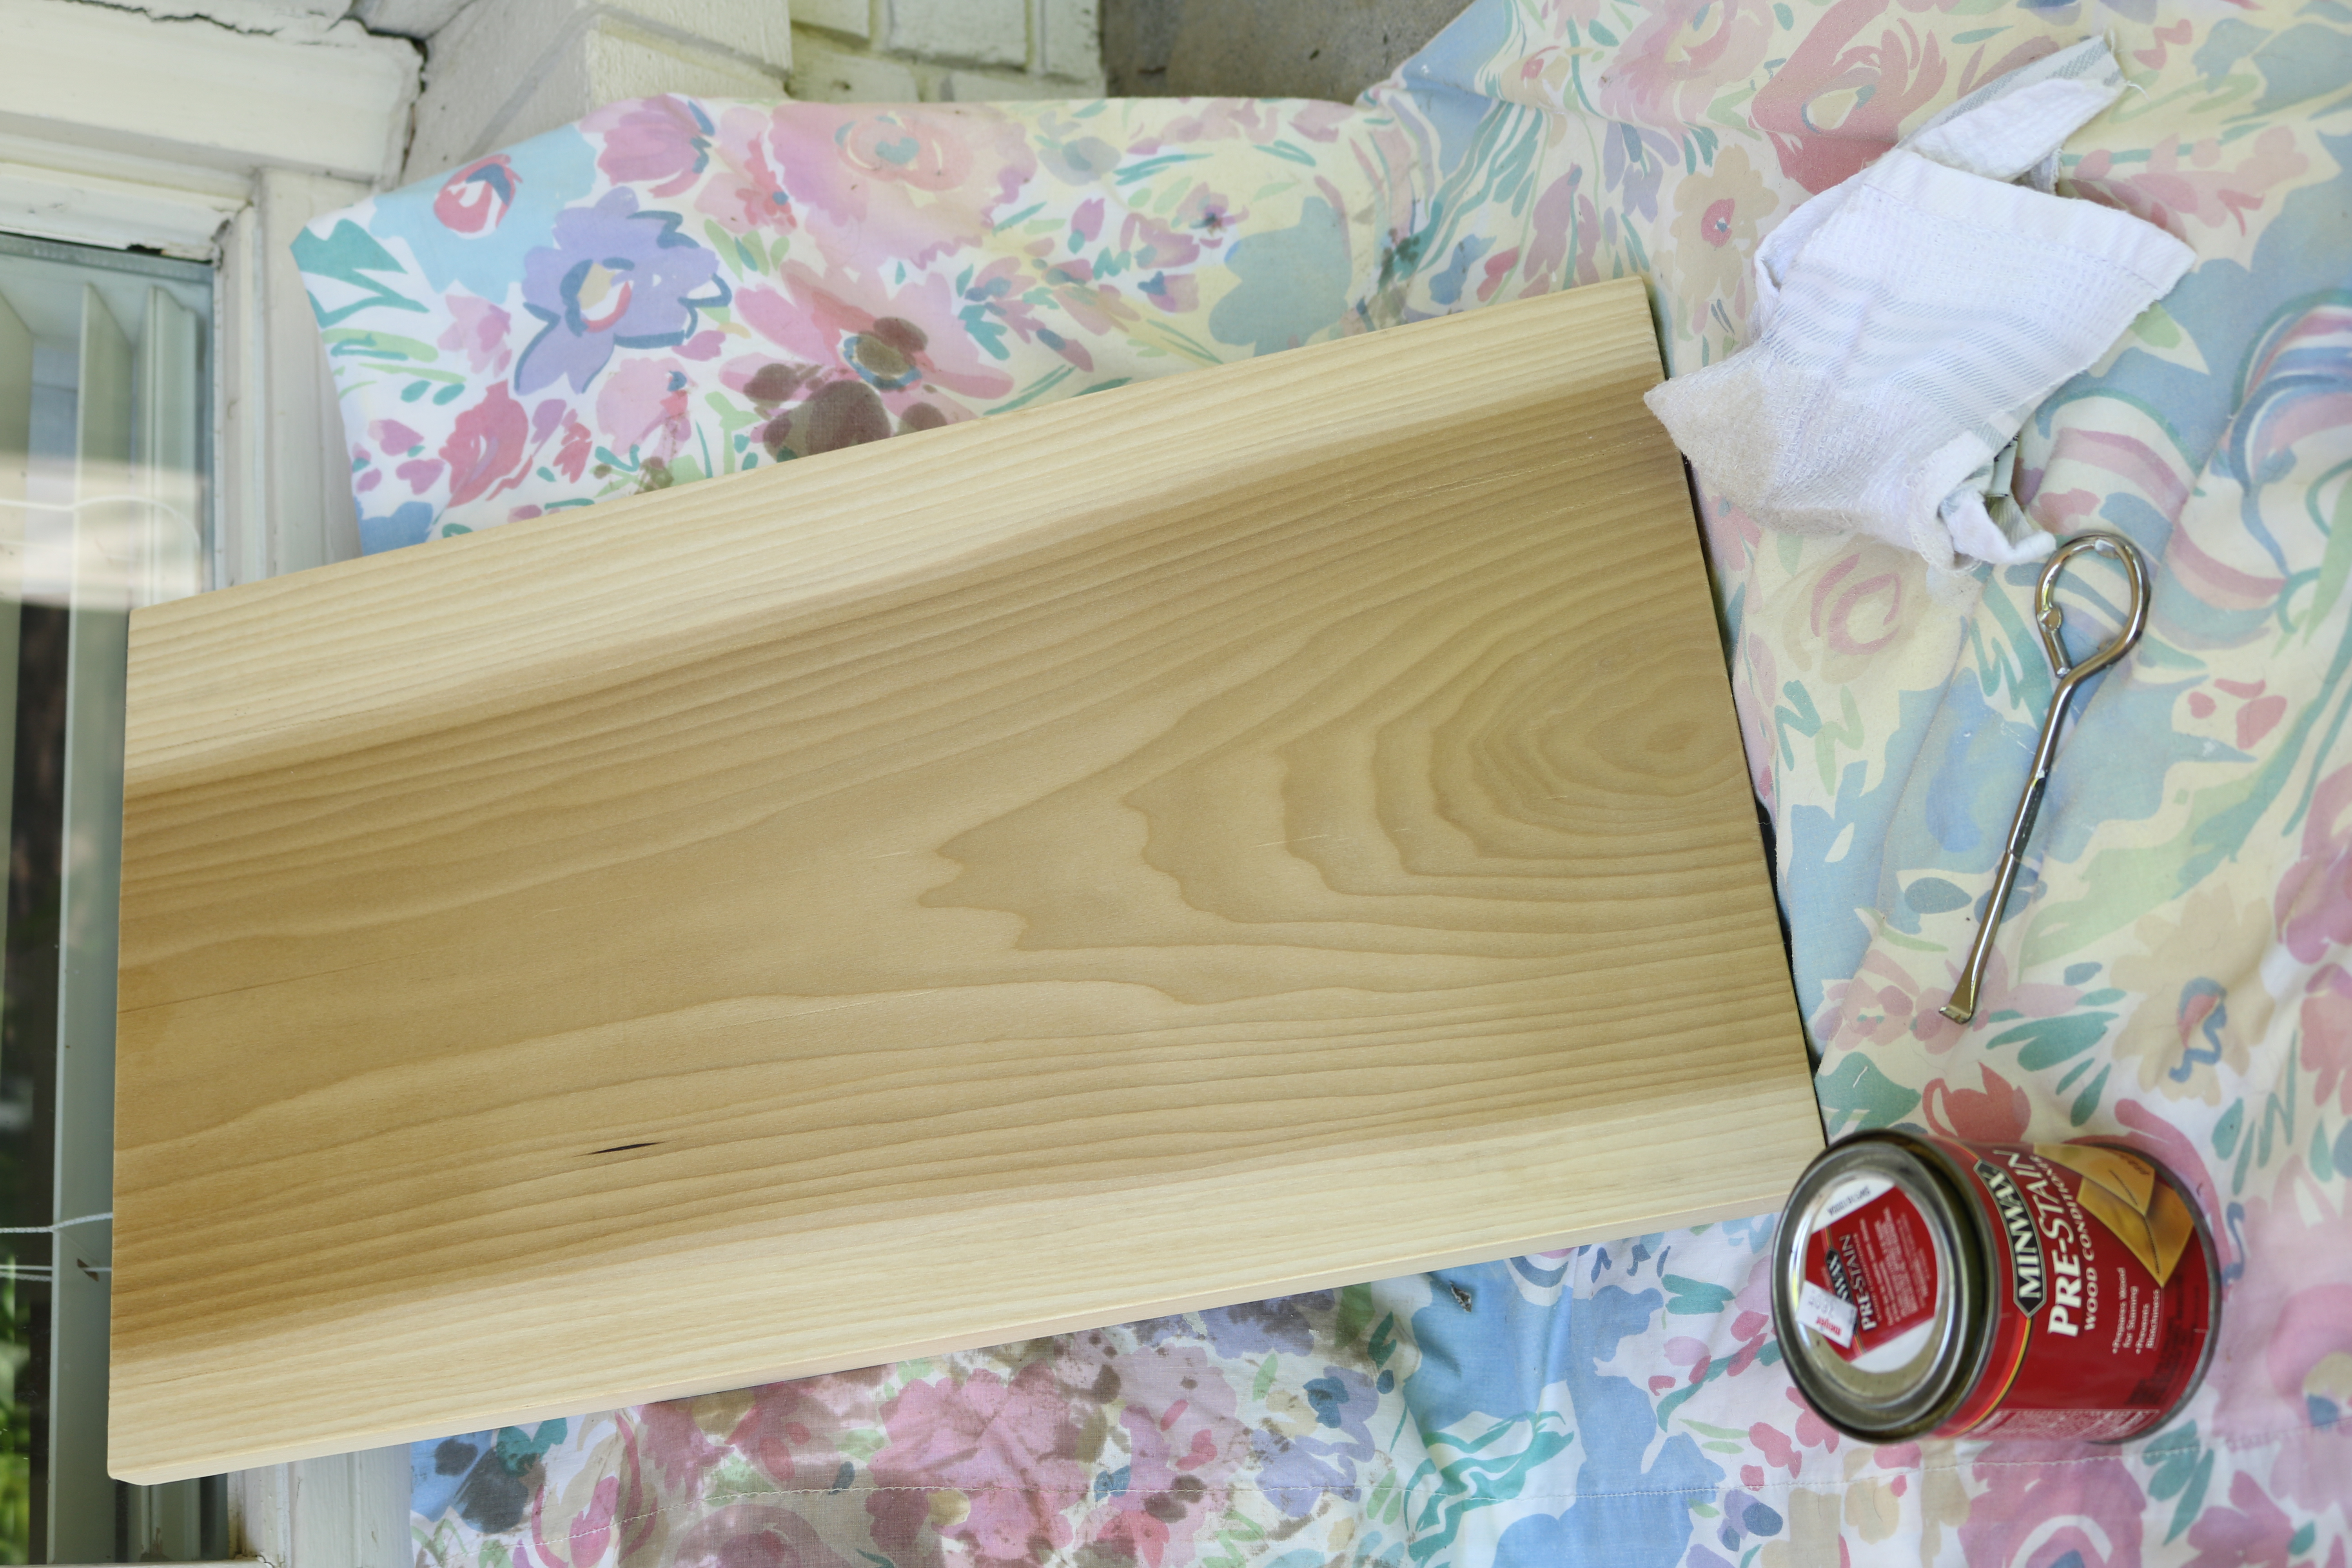
3. Using a cloth and gloves, apply a thin layer of stain on all sides of the board. Make sure you apply the stain within 2 hours of the wood conditioner. I used Minwax Dark Walnut.
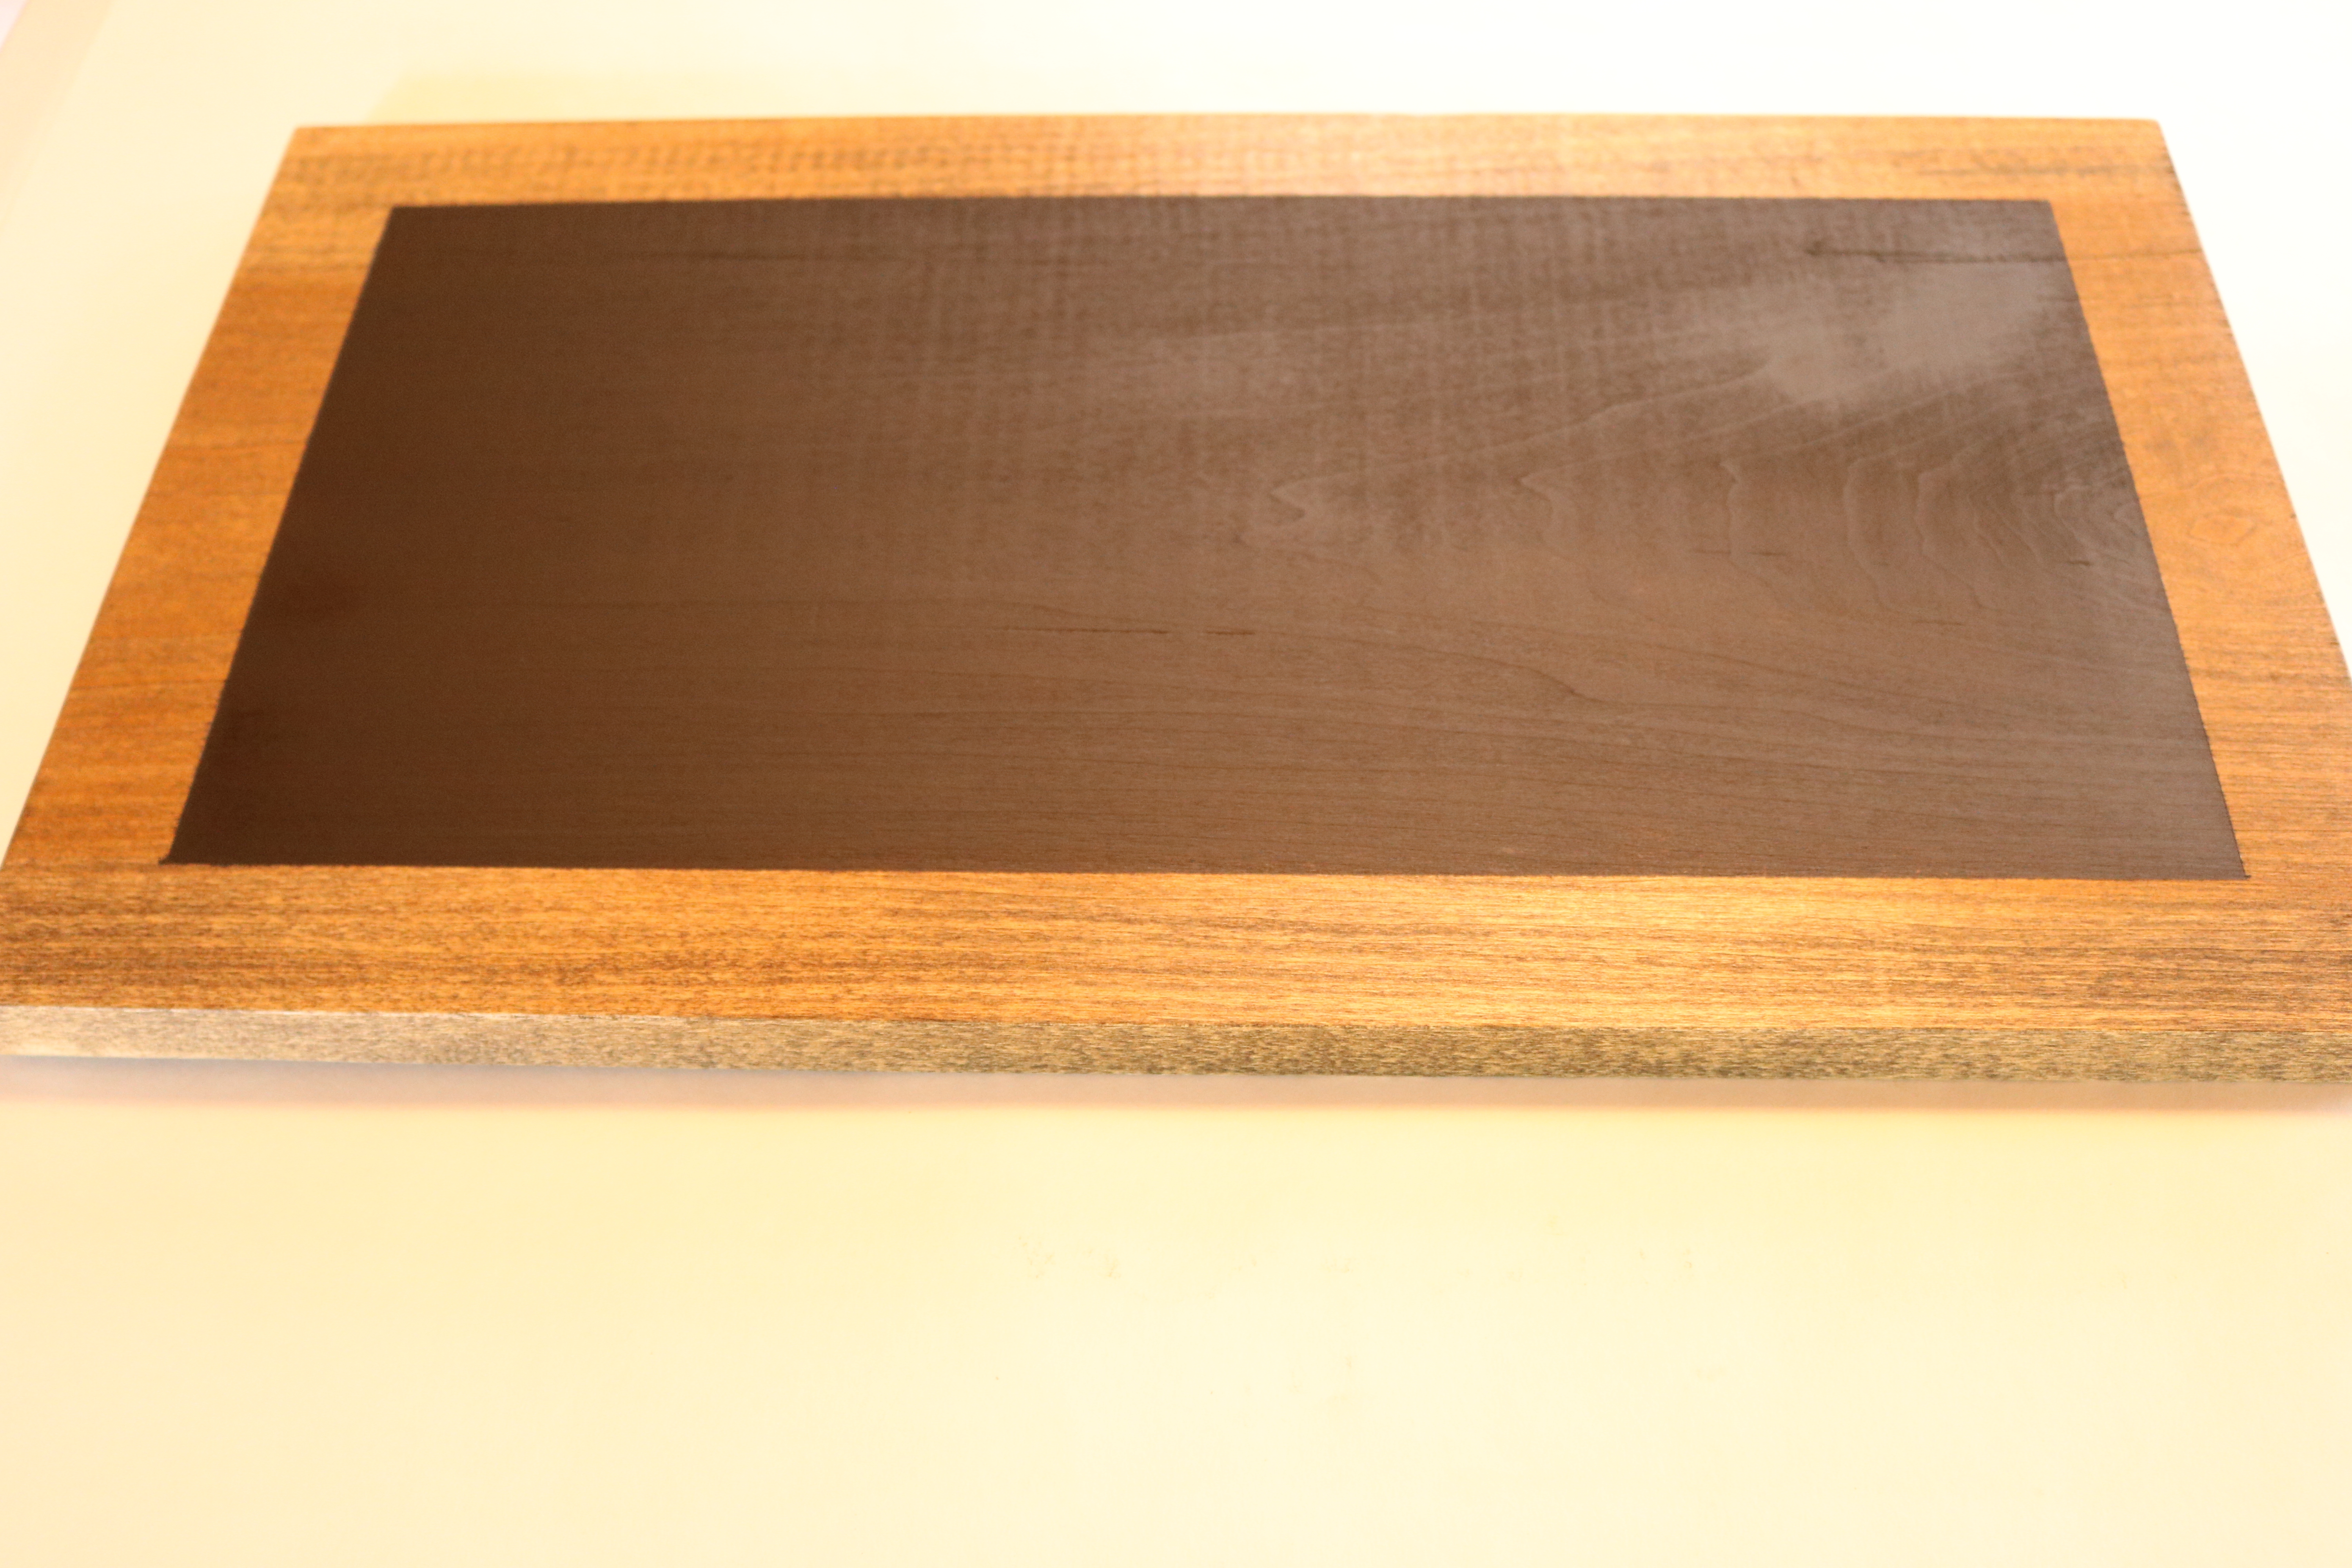
4. Next we’re going to use painter’s tape to cover the area we don’t want exposed to the paint. To make this step simple (read: avoid measuring), I matched the edge of the painter’s tape up with the edge of the board. Go over the edges of the tape with a credit card to make sure they’re sealed tight. During my first attempt I ran over the edges with my nail and the spray paint bled through the tape. Make sure it’s good and sealed.
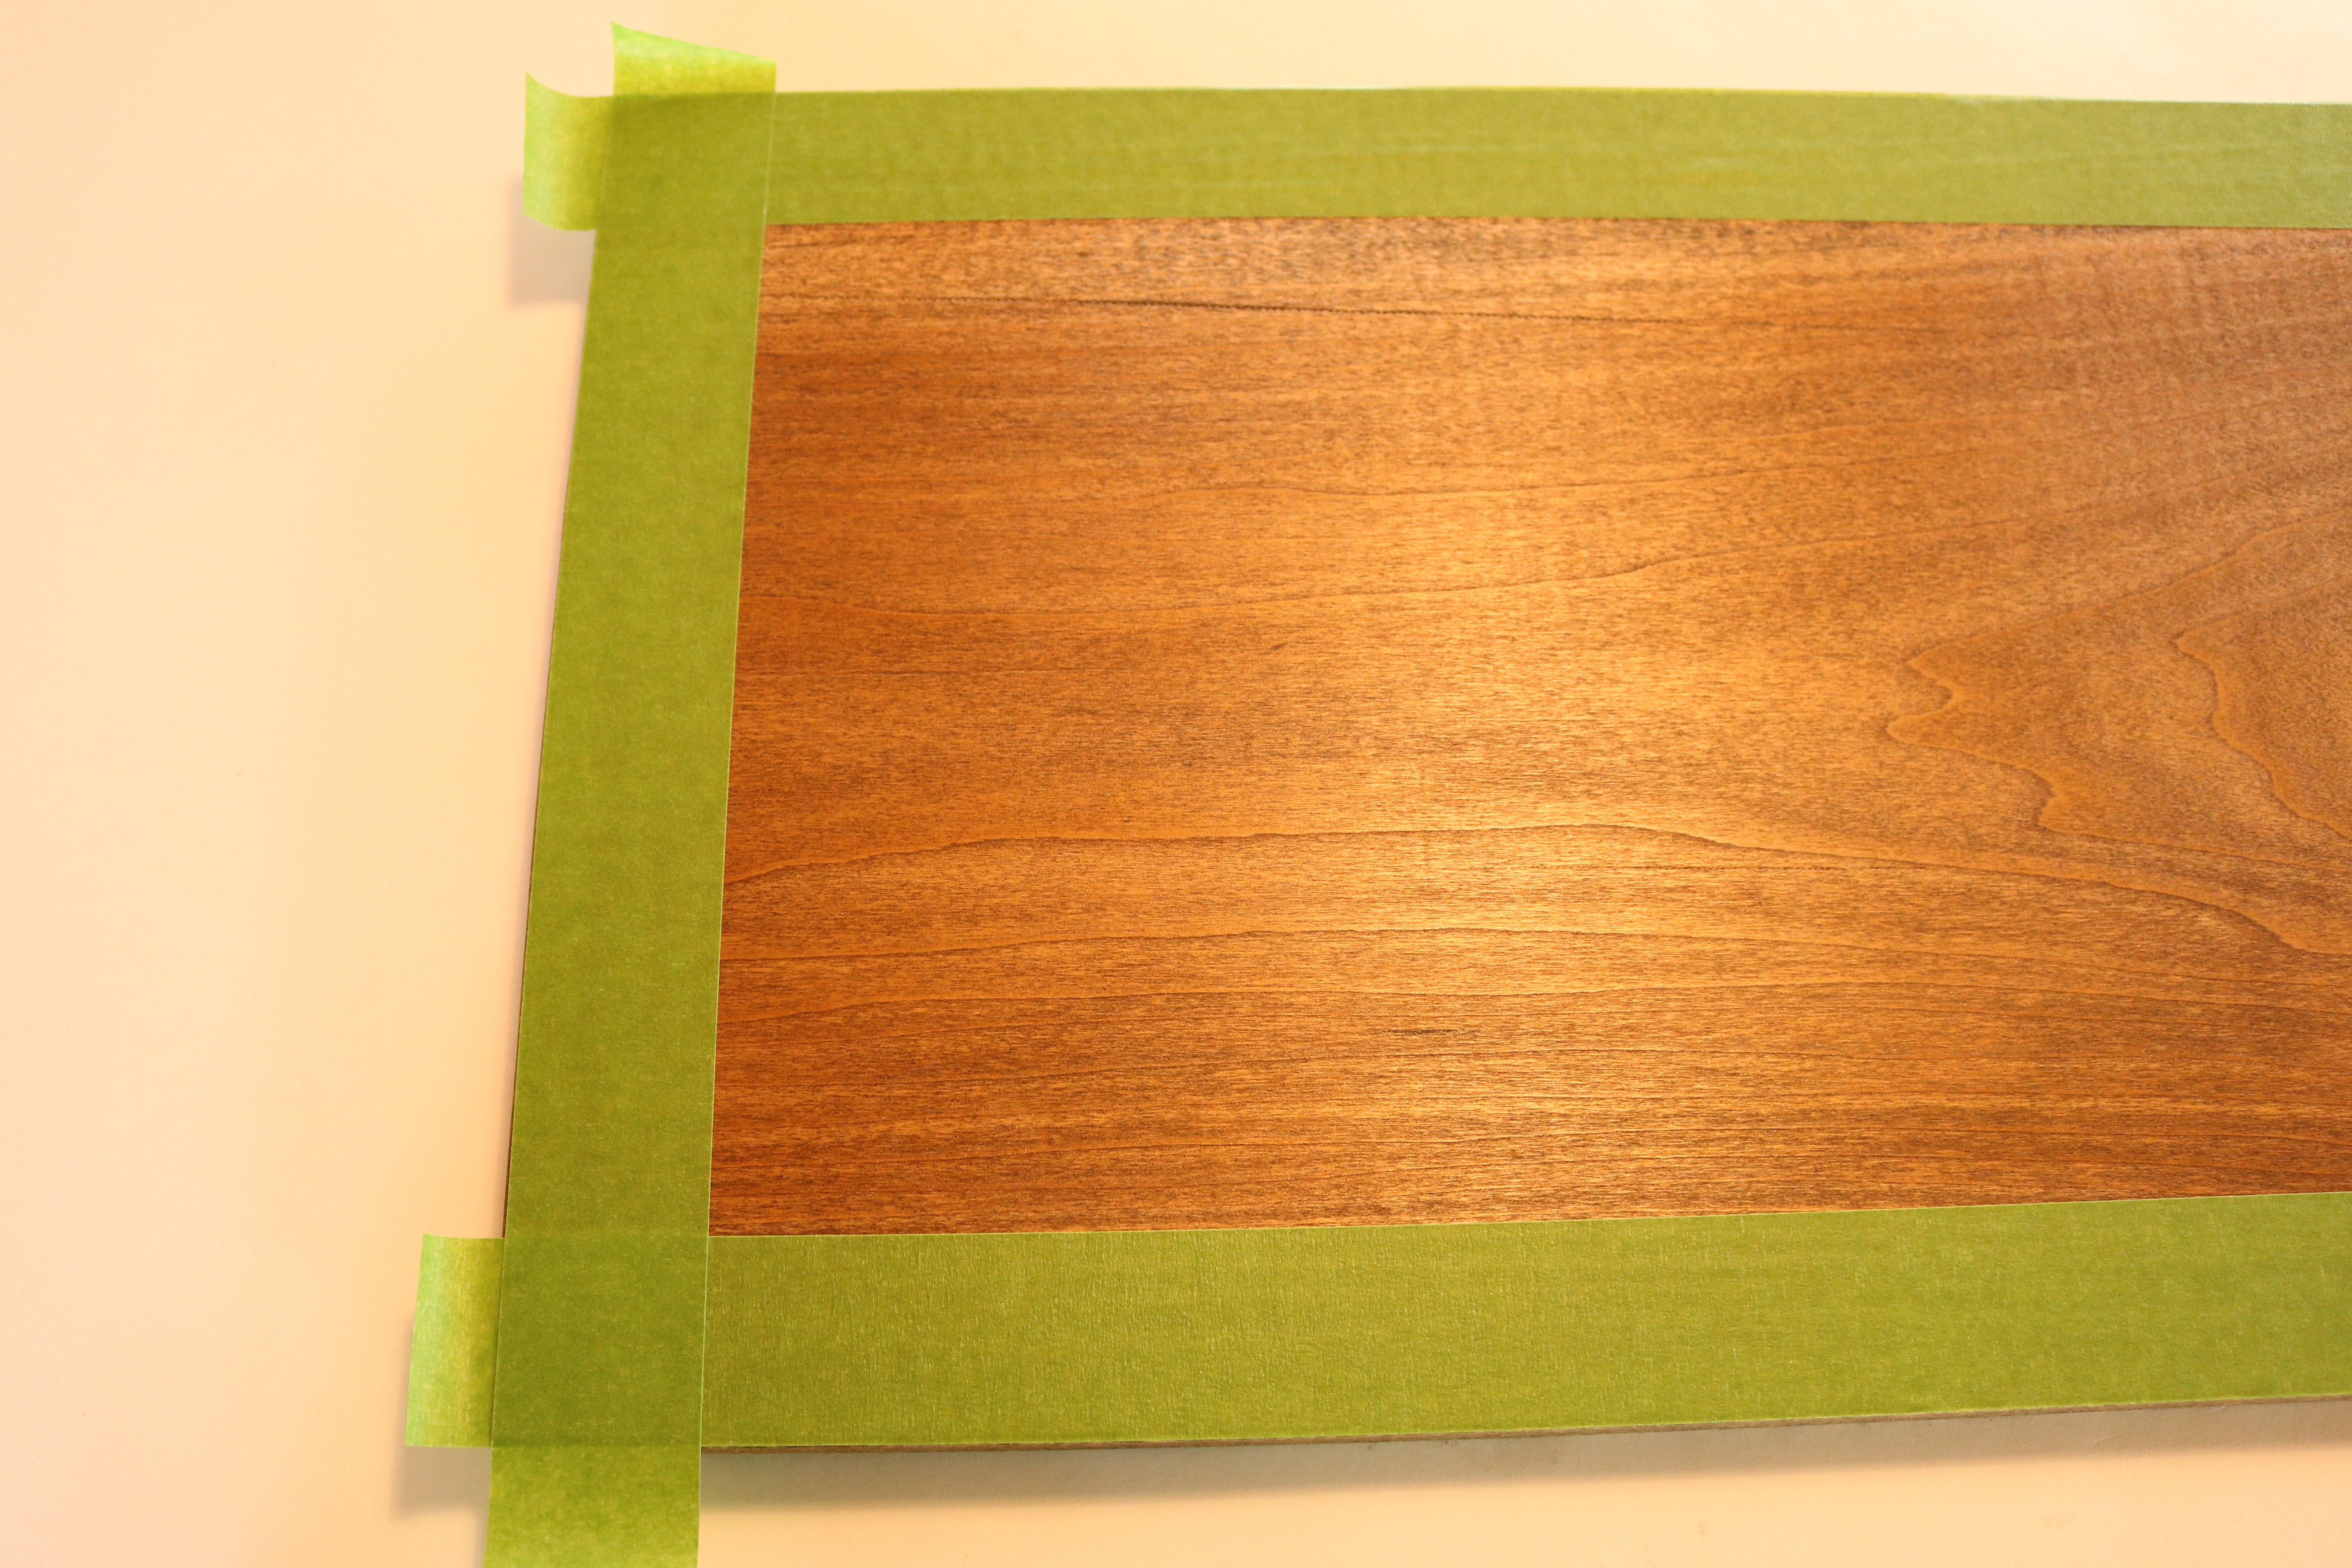
5. Lay the board flat and spray the inner exposed rectangle with a matte black spray paint. Make sure the paint you choose is for outdoor use. I used Rustoleum Inspire Designer Series in Ultra Matte Black. Remove tape shortly after spraying and allow it to dry. If you need more coverage than the first coat provided, repeat steps 4-5 and spray again.
6. Next, print out your address, and tape the template together if the numbers are on multiple pieces of paper. I used 450 pt font in Playfair Display.

7. Place a piece of white graphite paper (shiny side up) on top of the painted area of the board then center the address print out on top of the paper. Tape the address paper to the board.
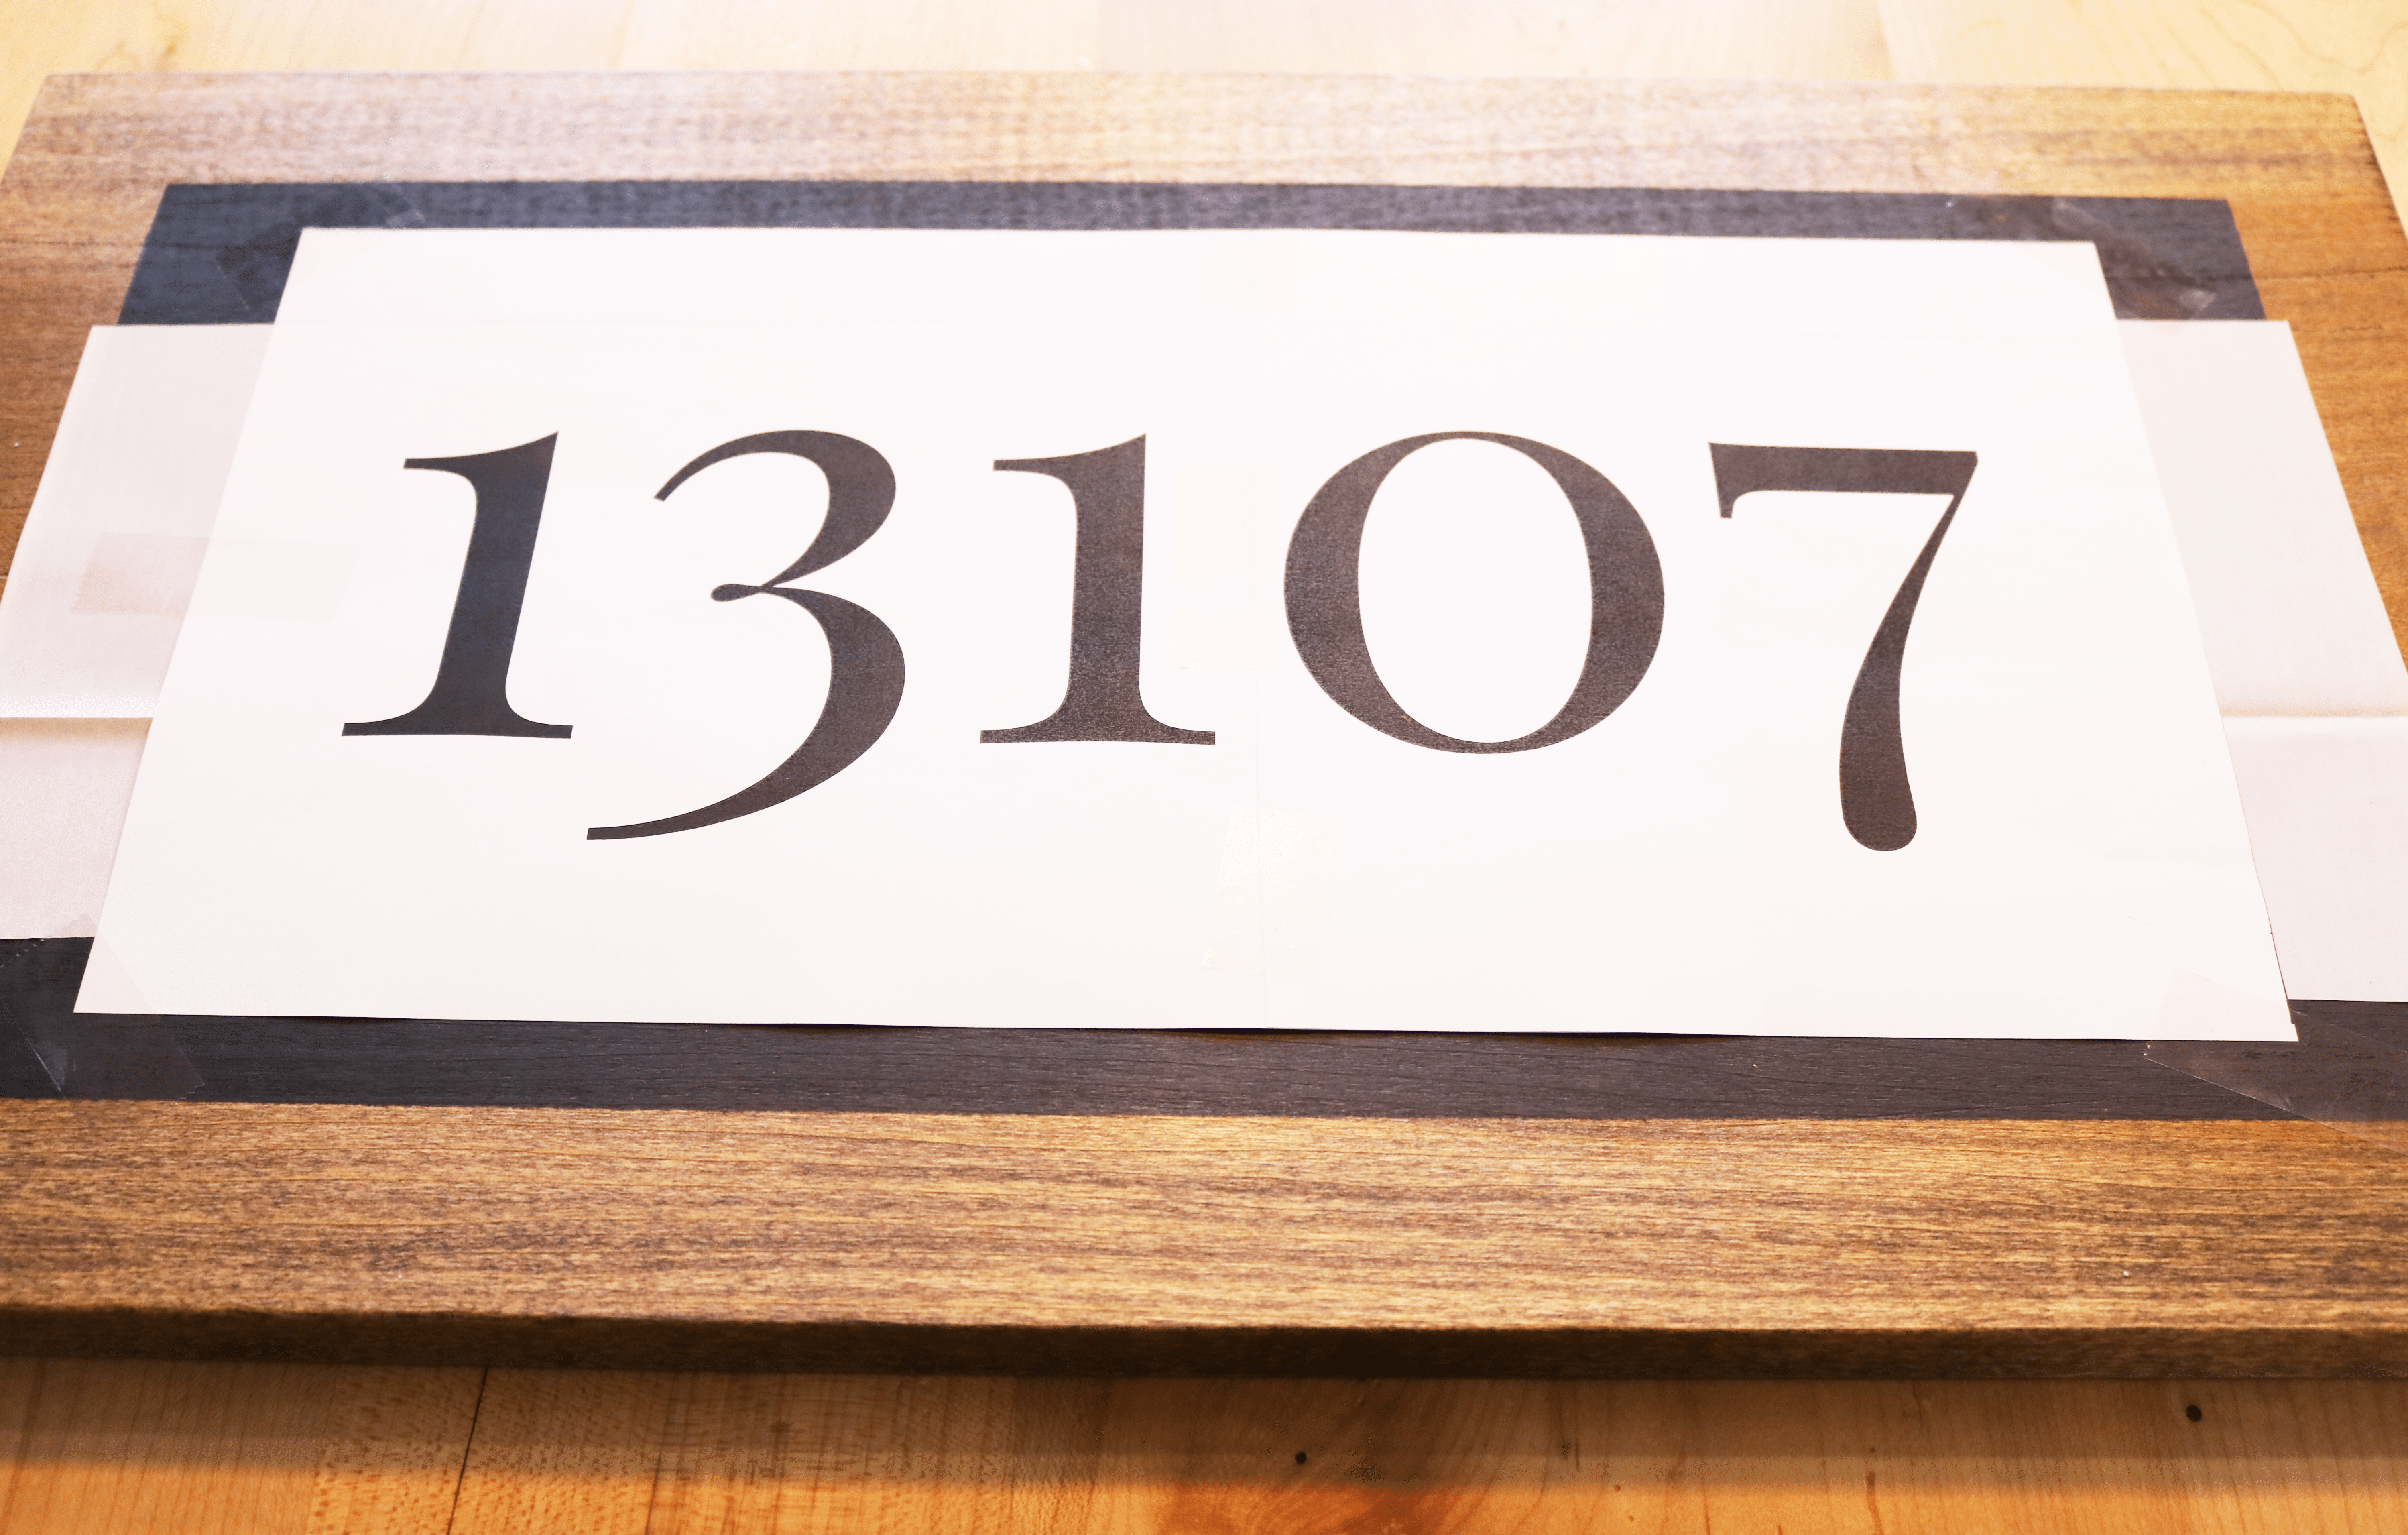
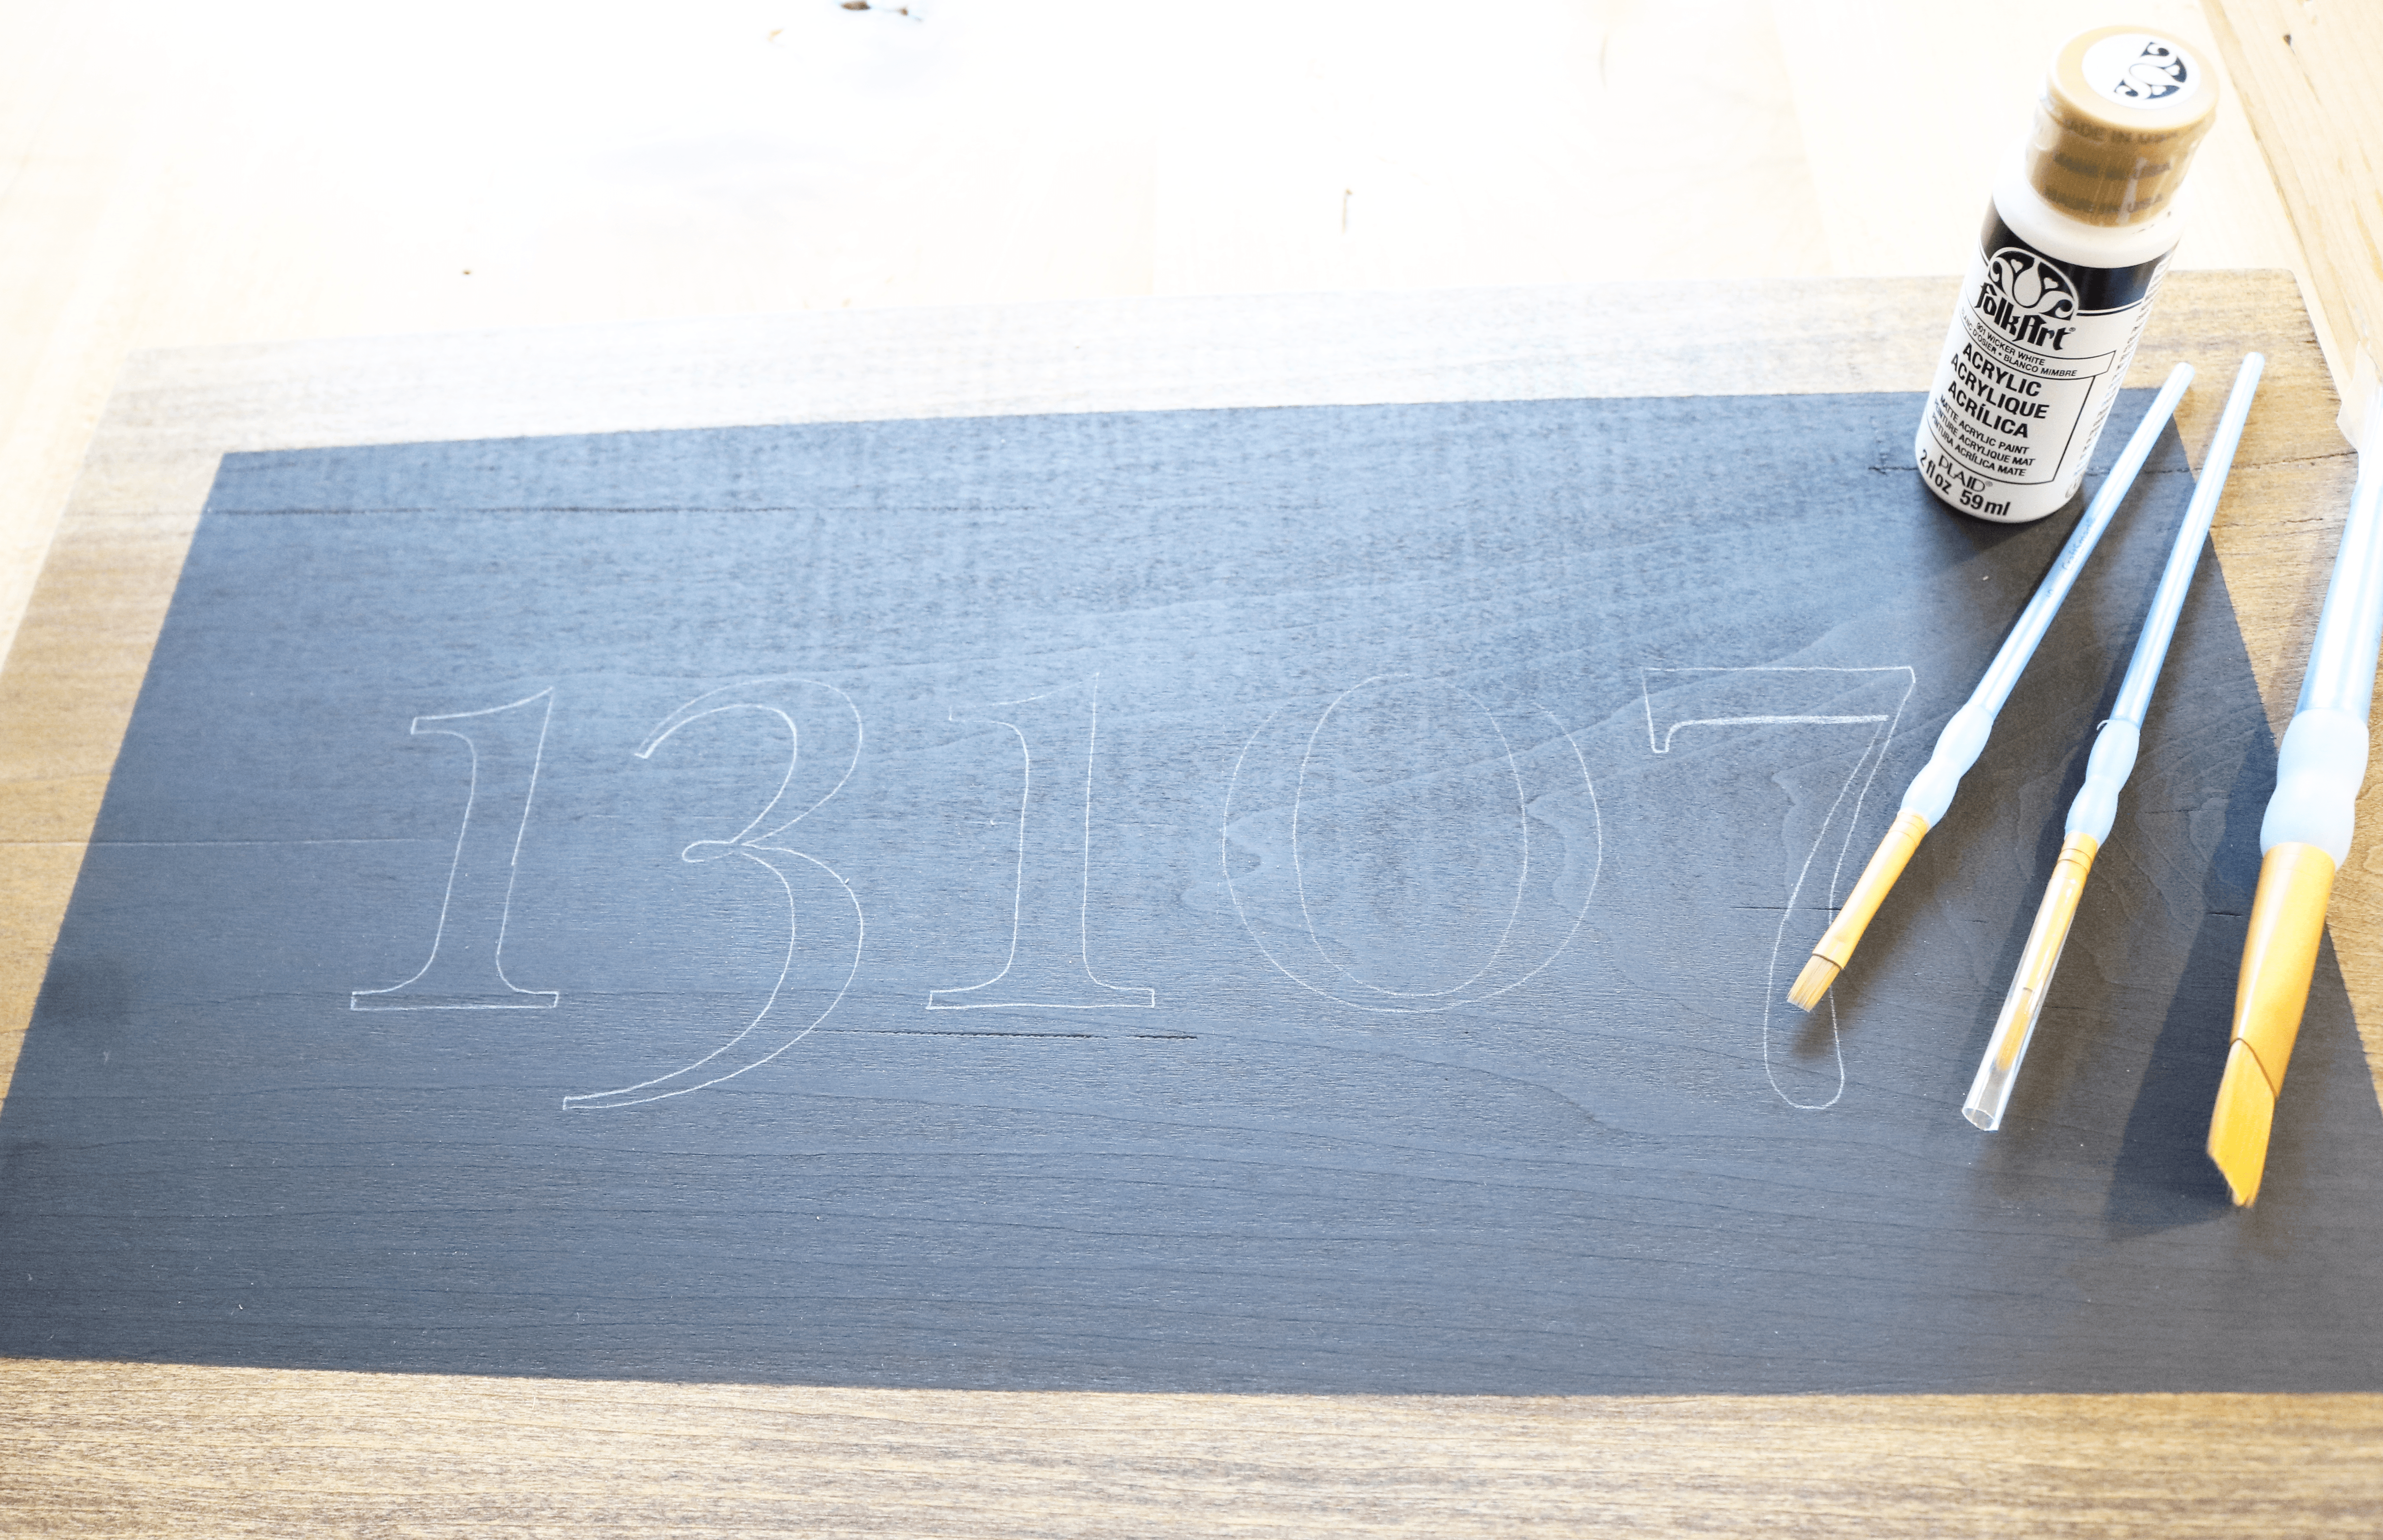
8. Use a pencil to trace the numbers of the address. The white graphite paper will transfer your marks on to the board.

9. Paint the numbers using white acrylic paint. After the first coat the black spray paint was still showing through the white letters so I added a second coat.
10. Once the white numbers are dry it’s time to apply Spar-urethane. Spar-urethane is a coating that will protect the sign from the elements. It comes in satin, semi gloss and clear gloss. I chose the satin finish because I wanted the black spray paint to resemble a chalkboard.
In a well ventilated area apply one coat of spar-urethane to the back and sides of the sign. Use a paper towel to wipe off any excess that pooled on the front of the sign and allow that coat to dry. Flip the sign over and repeat. *I found it helpful to put my sign on saw horses for this step.
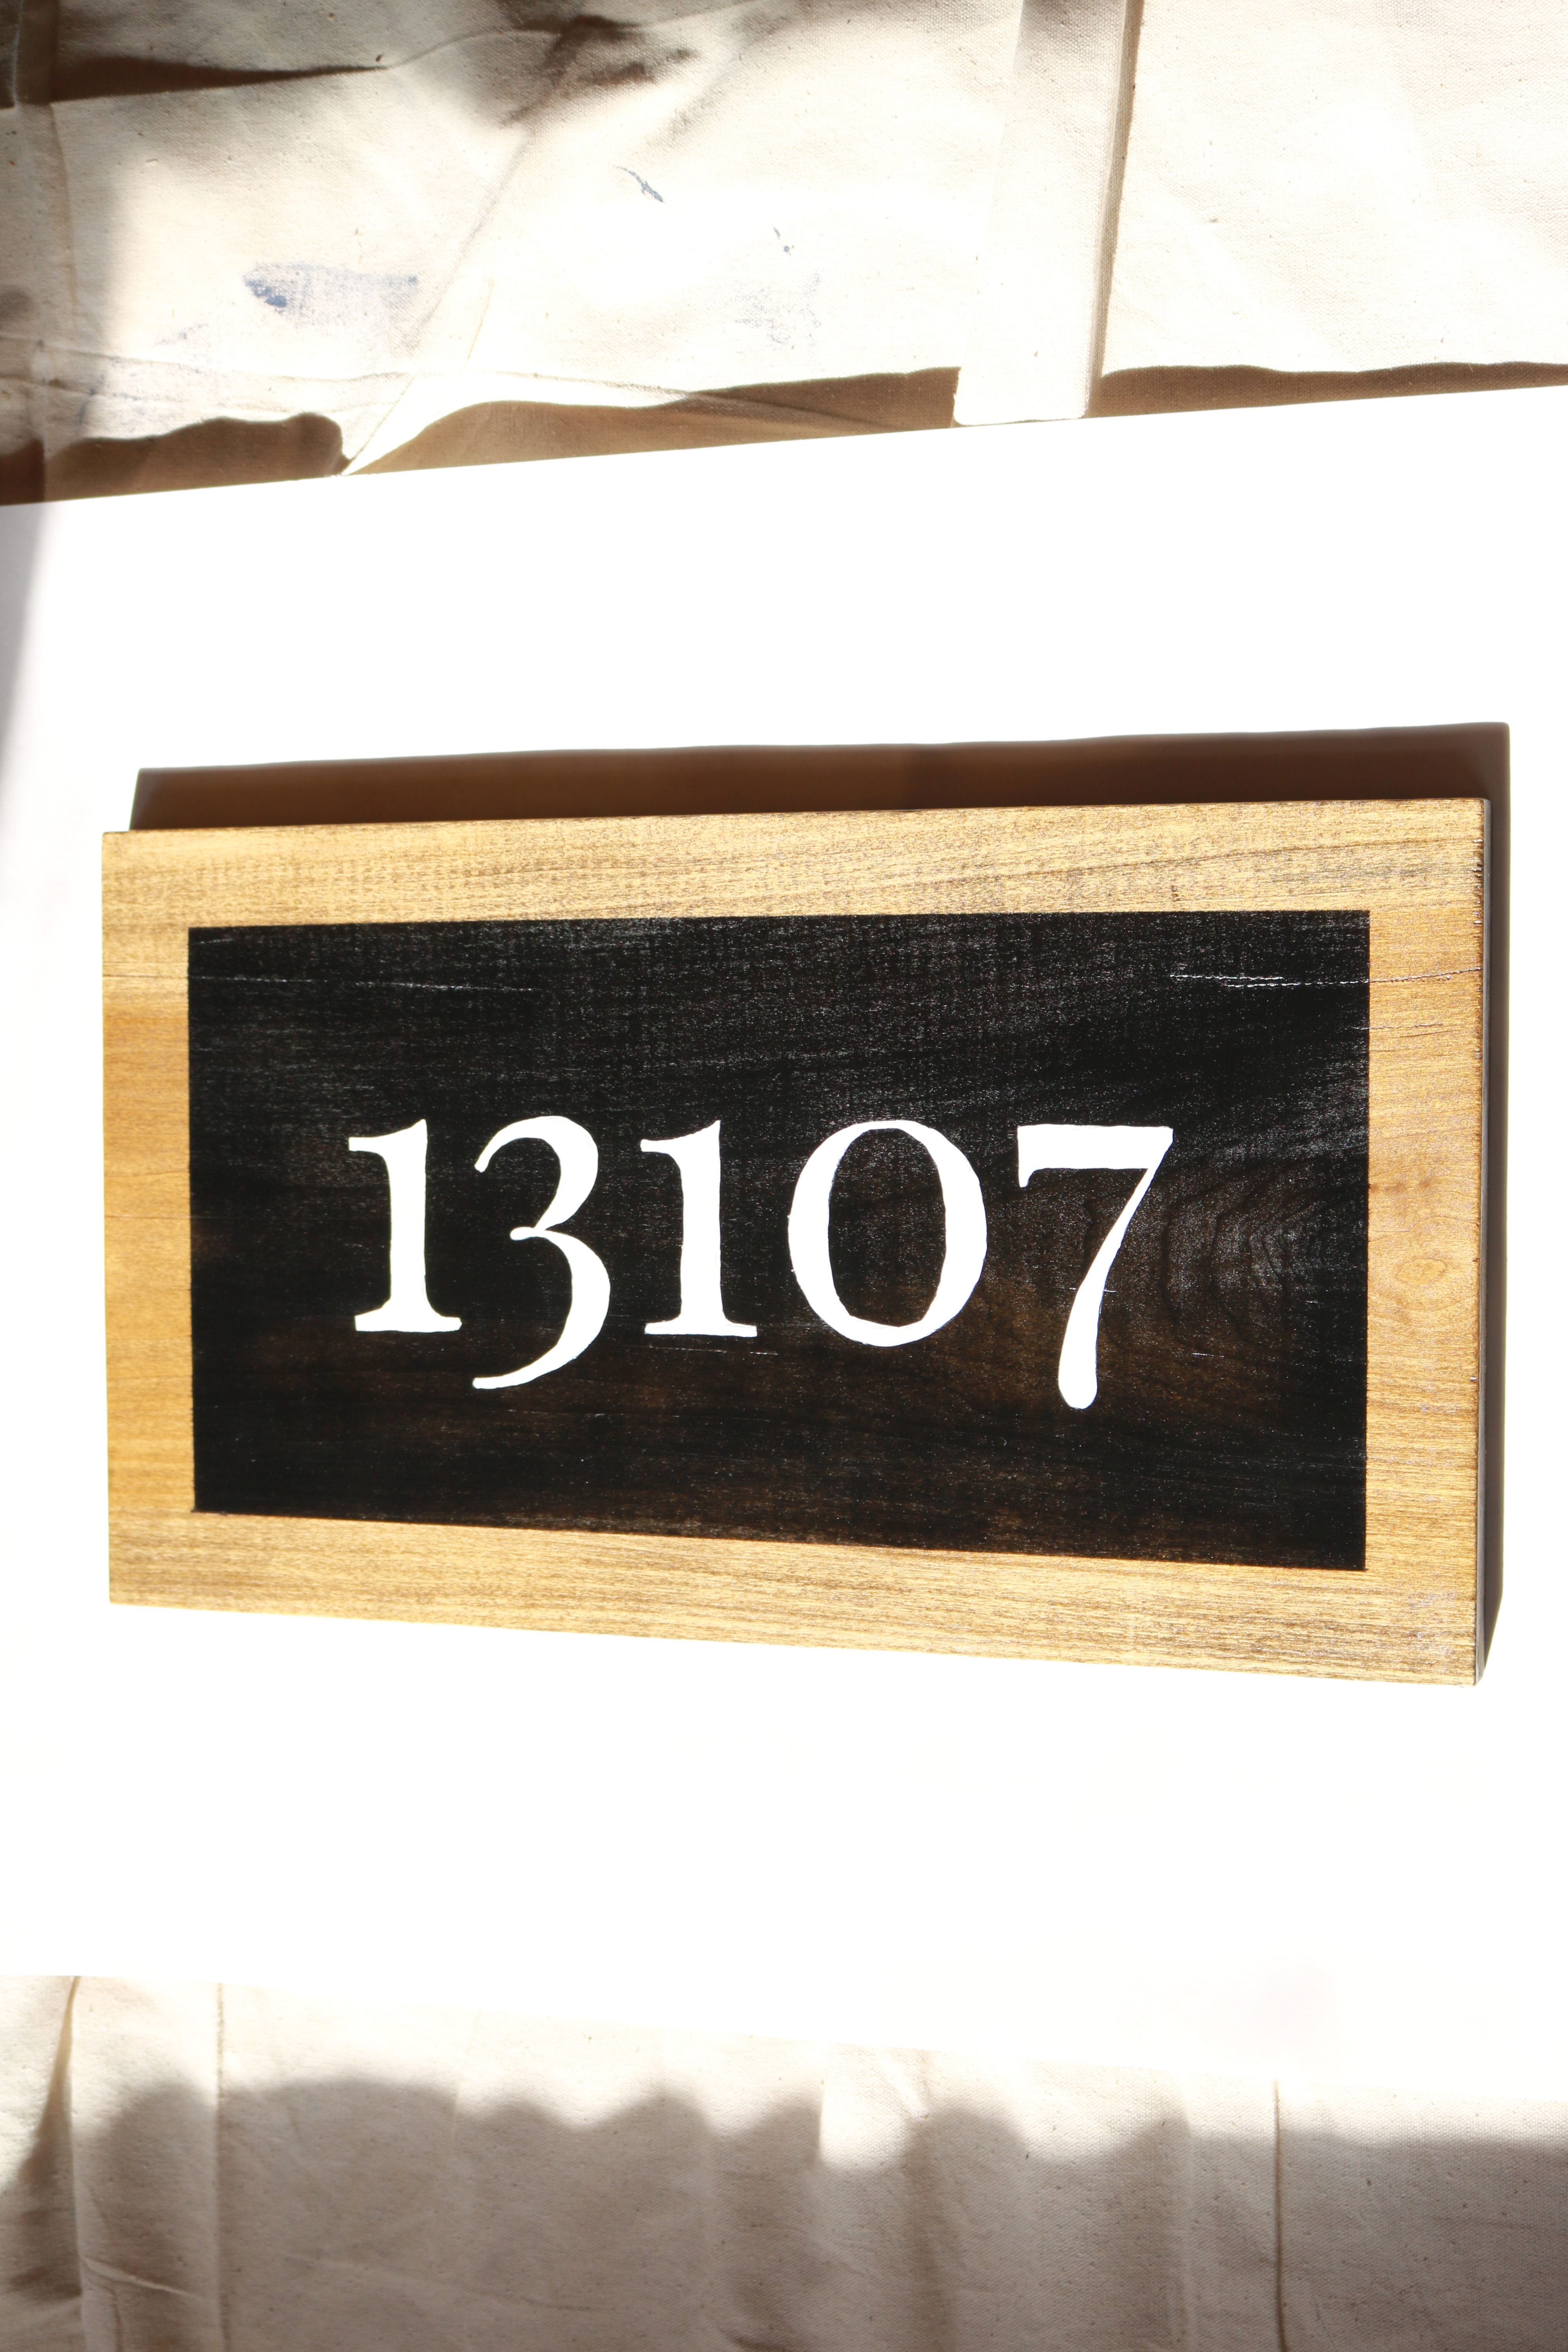
You’re done making your sign!
If you plan on hanging the sign on brick, follow these steps:
- Start by collecting your material for attaching the sign to brick. You’ll need:
- Drill
- Washers (4)
- Screws (4)
- Anchors (4)

2. Measure in ⅞ inch from each corner and drill four holes.
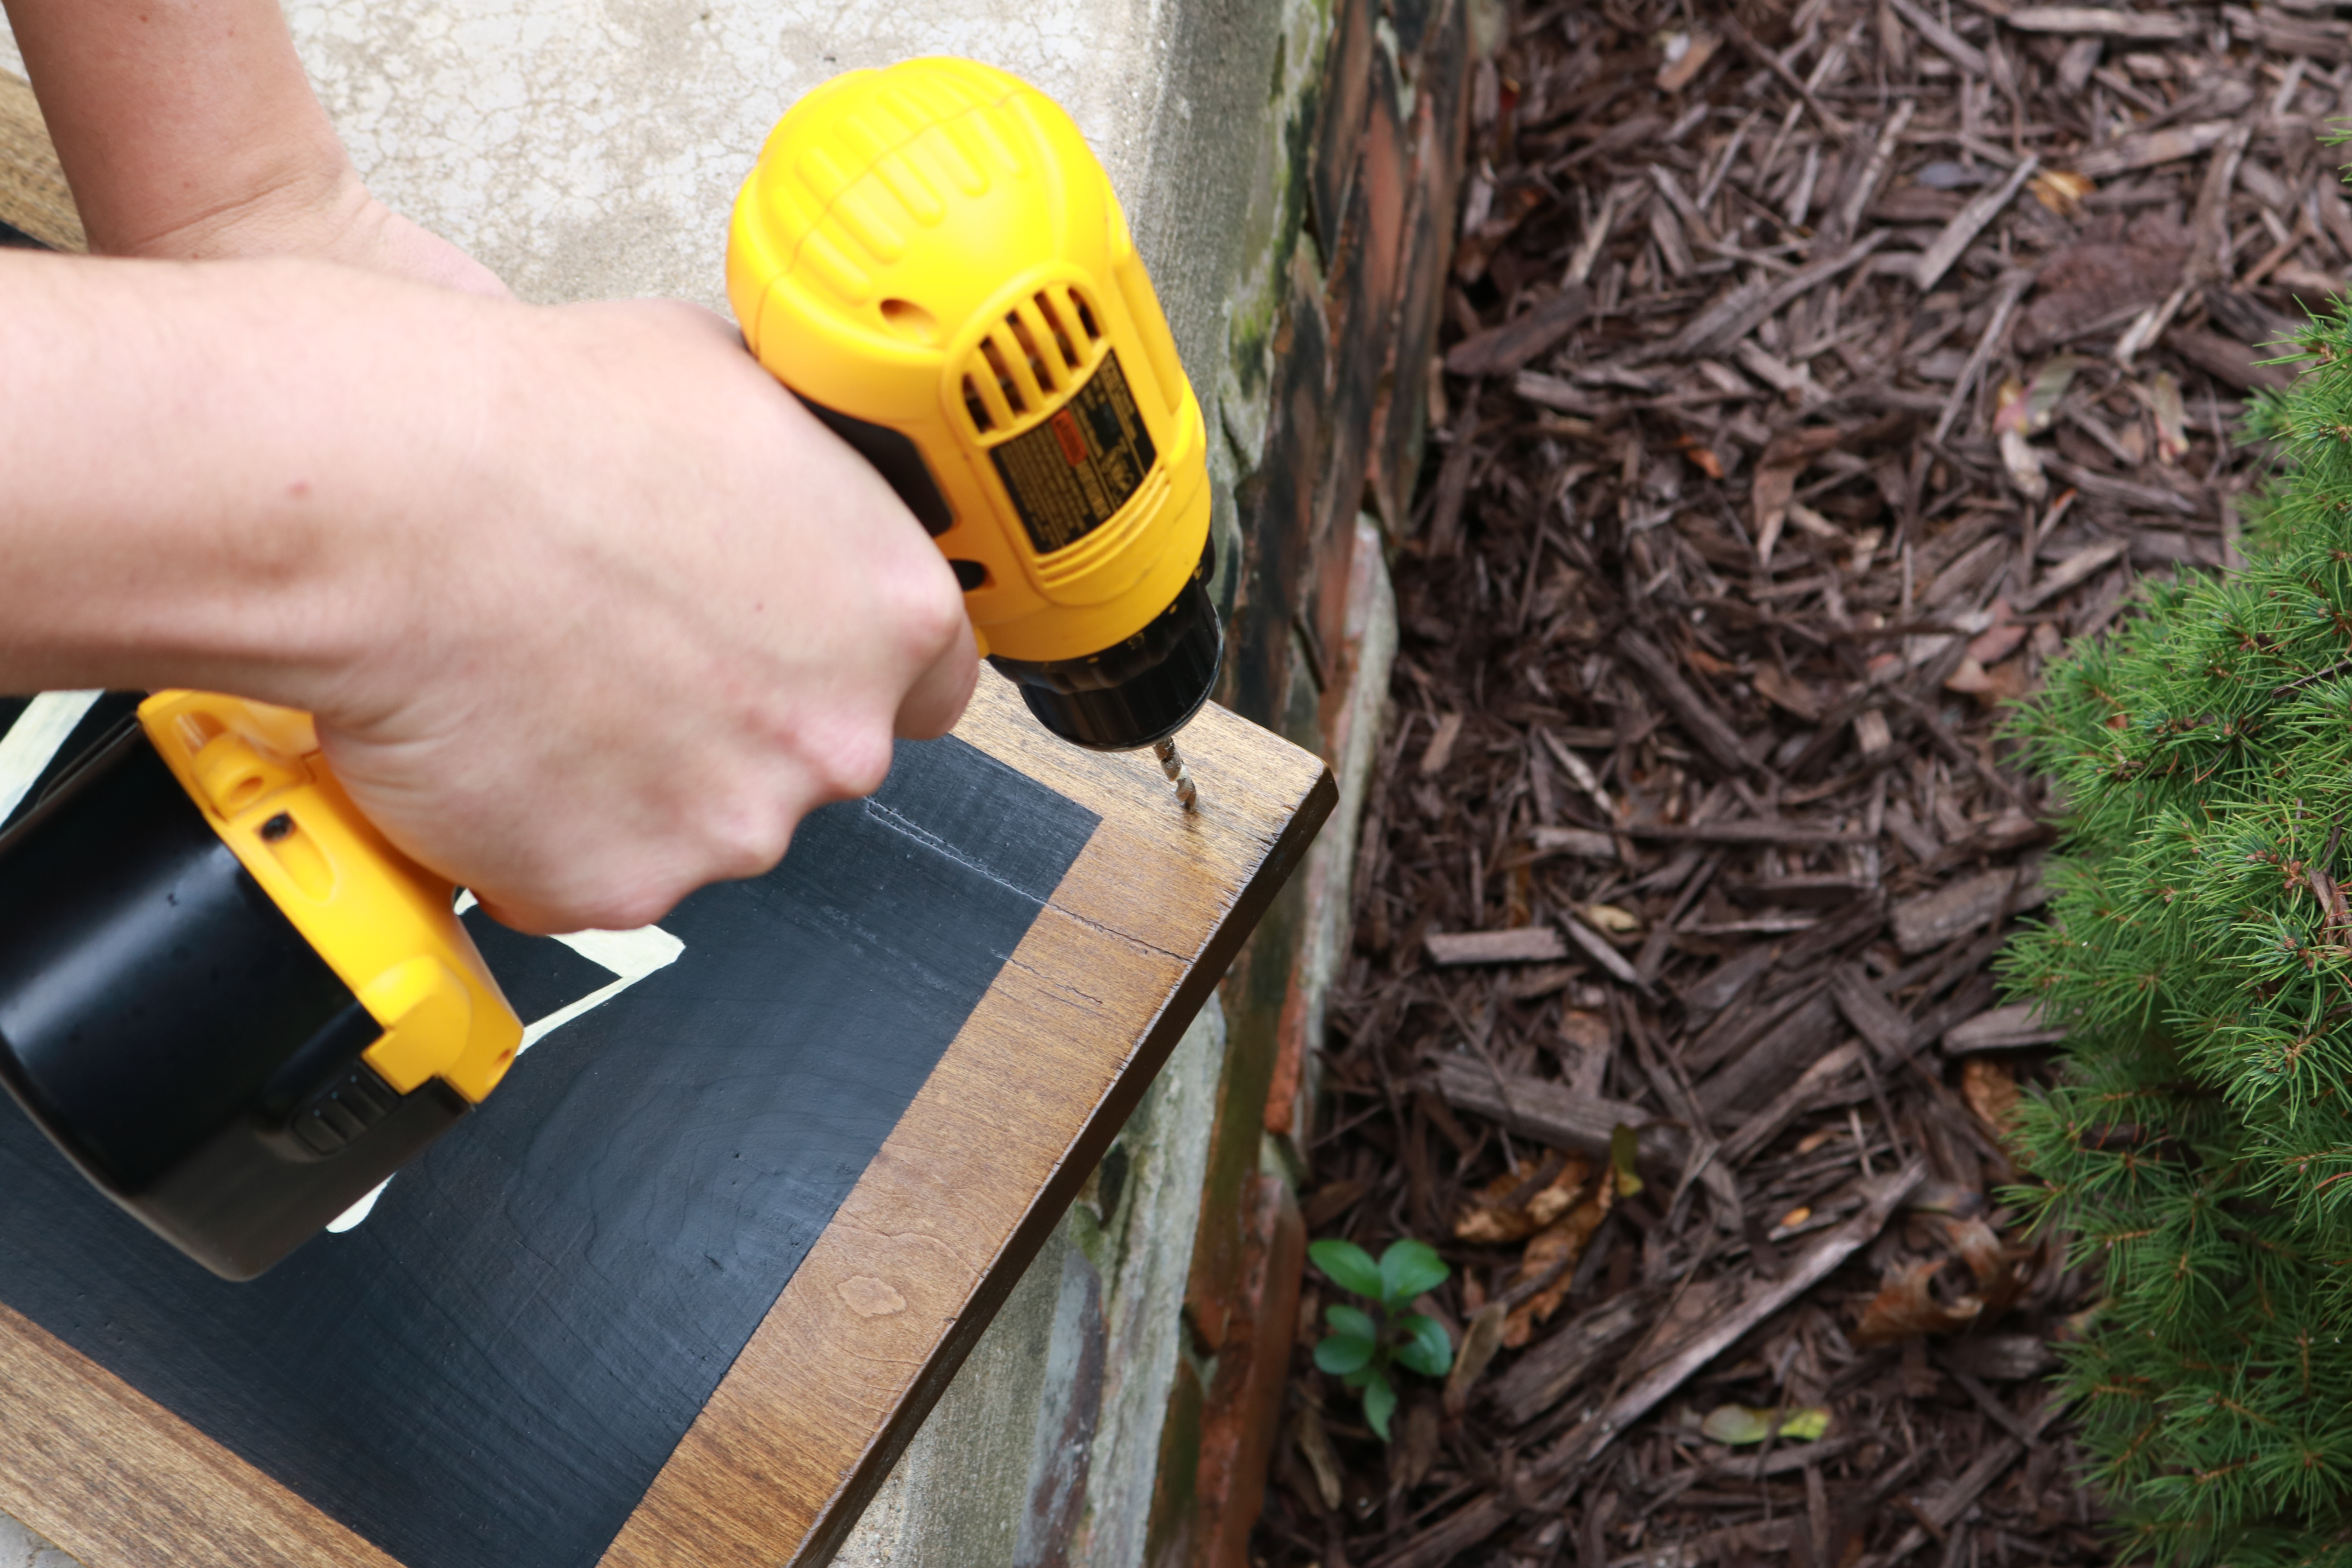
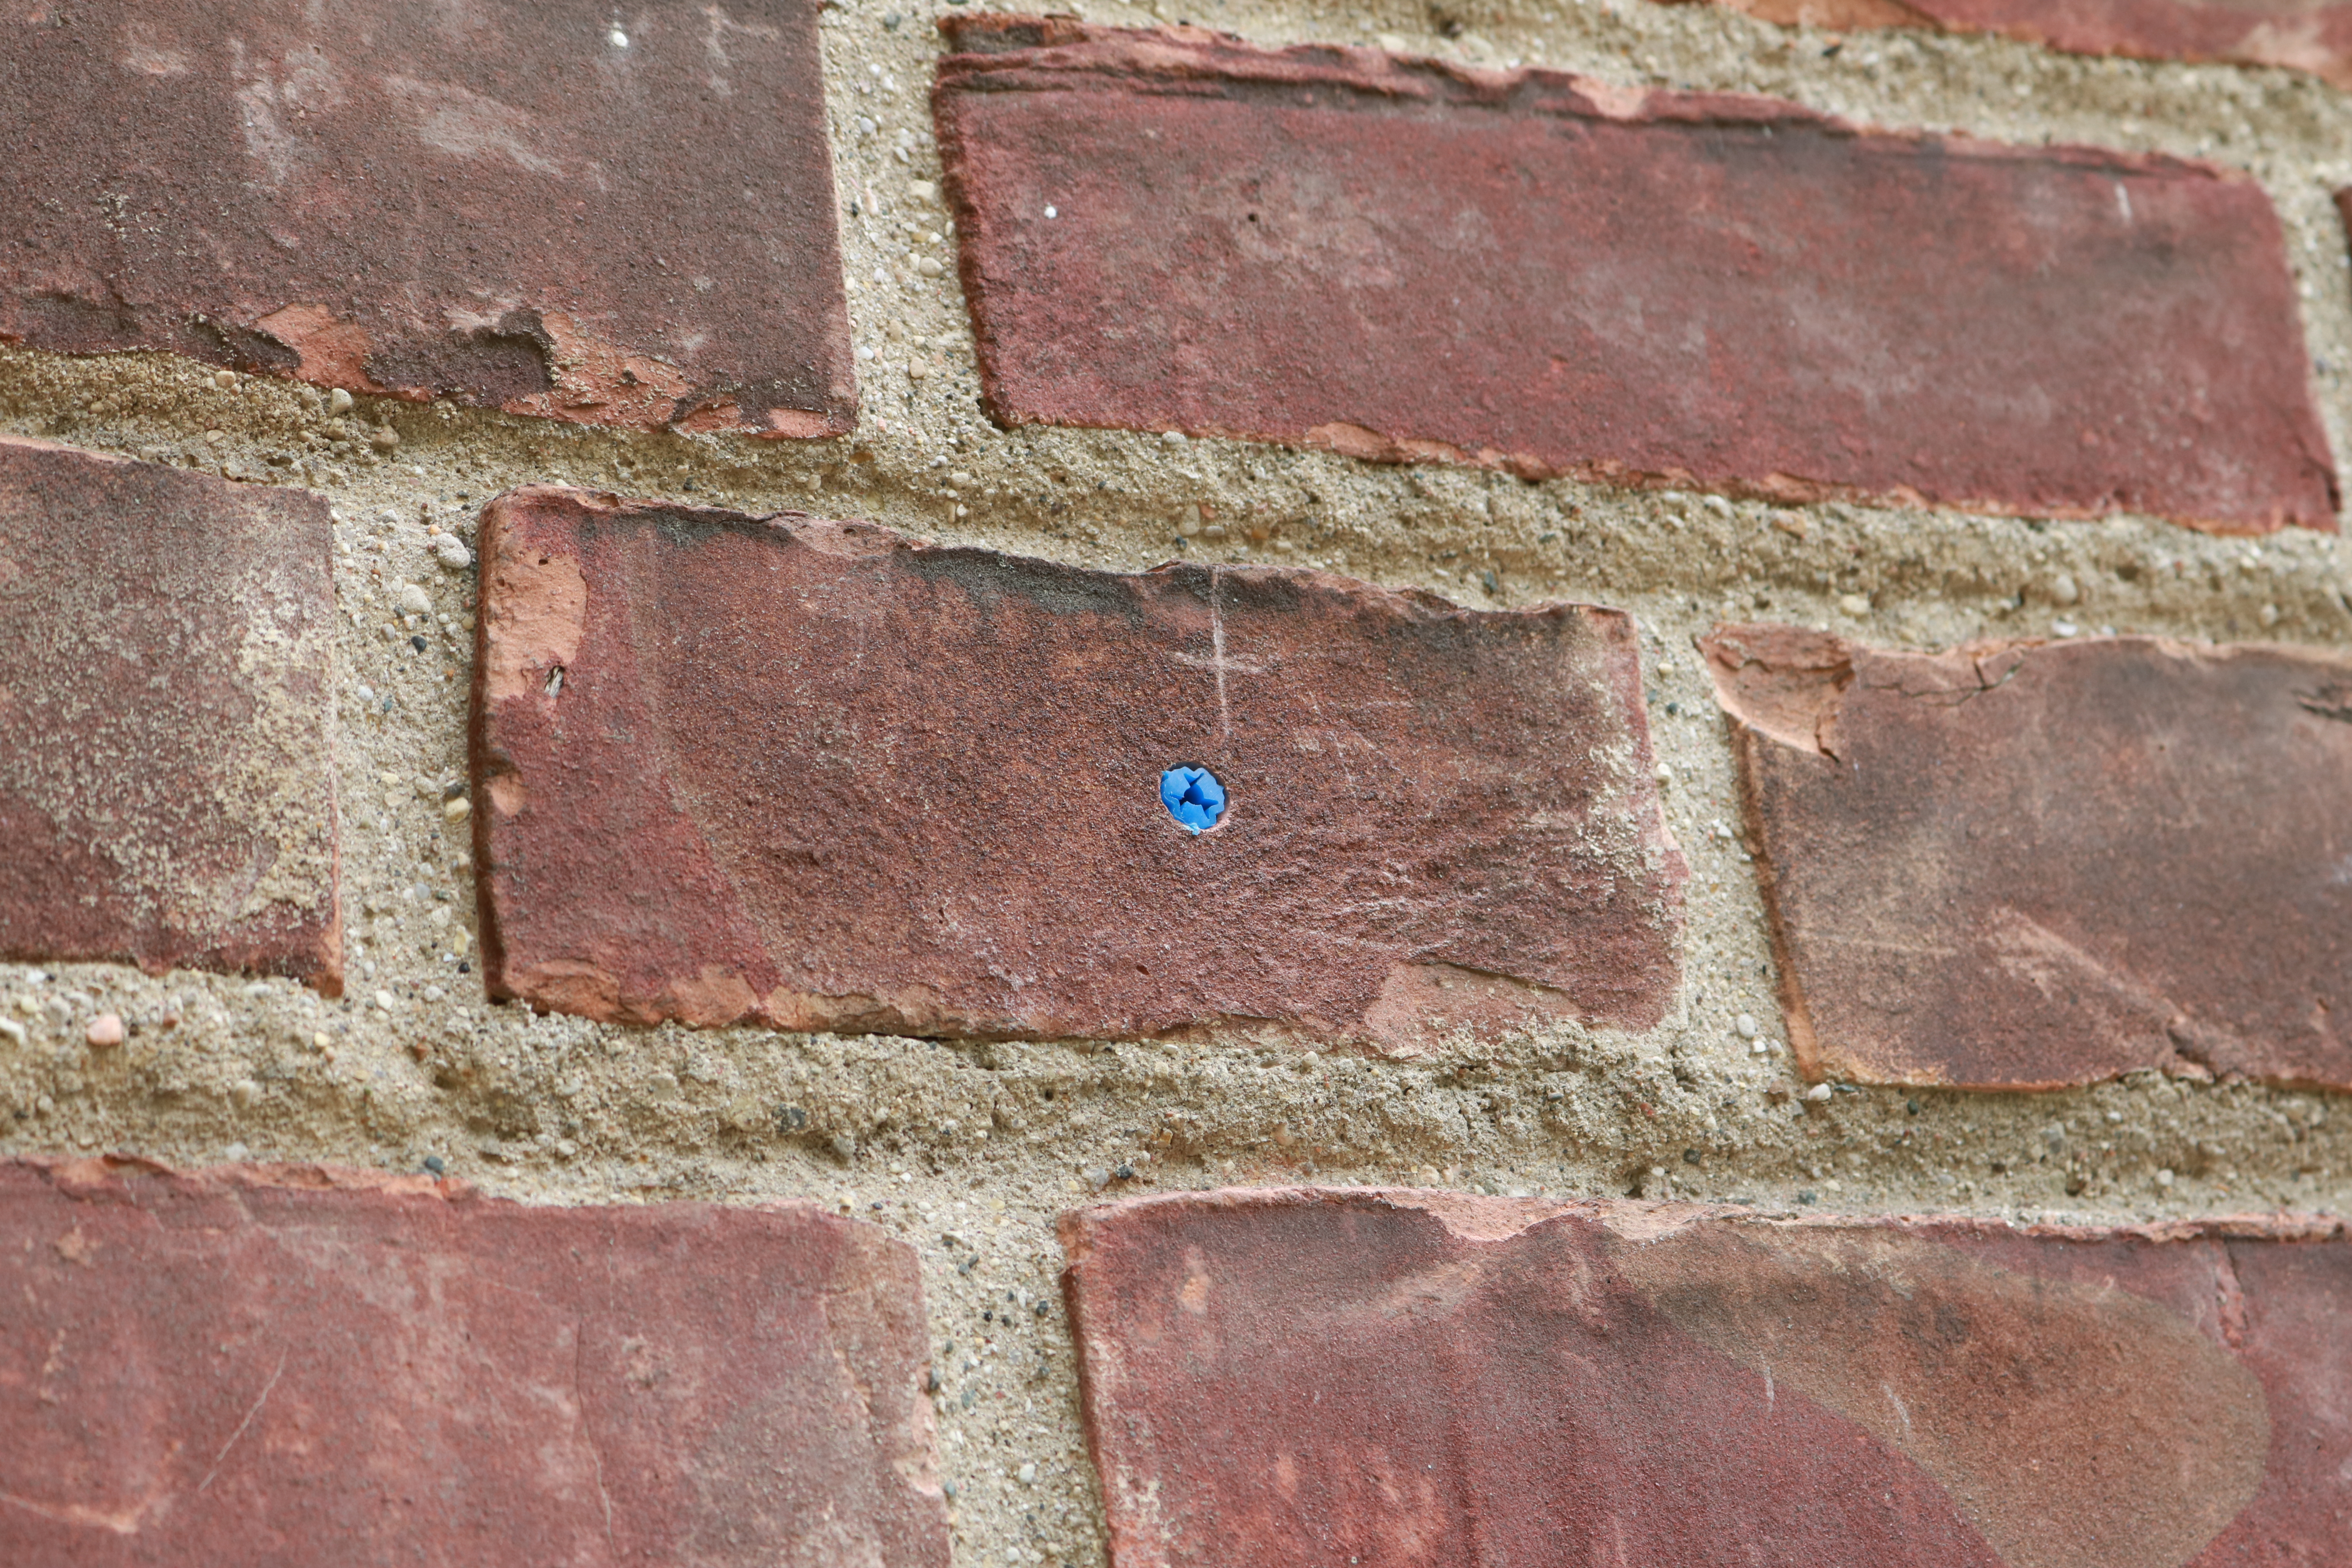
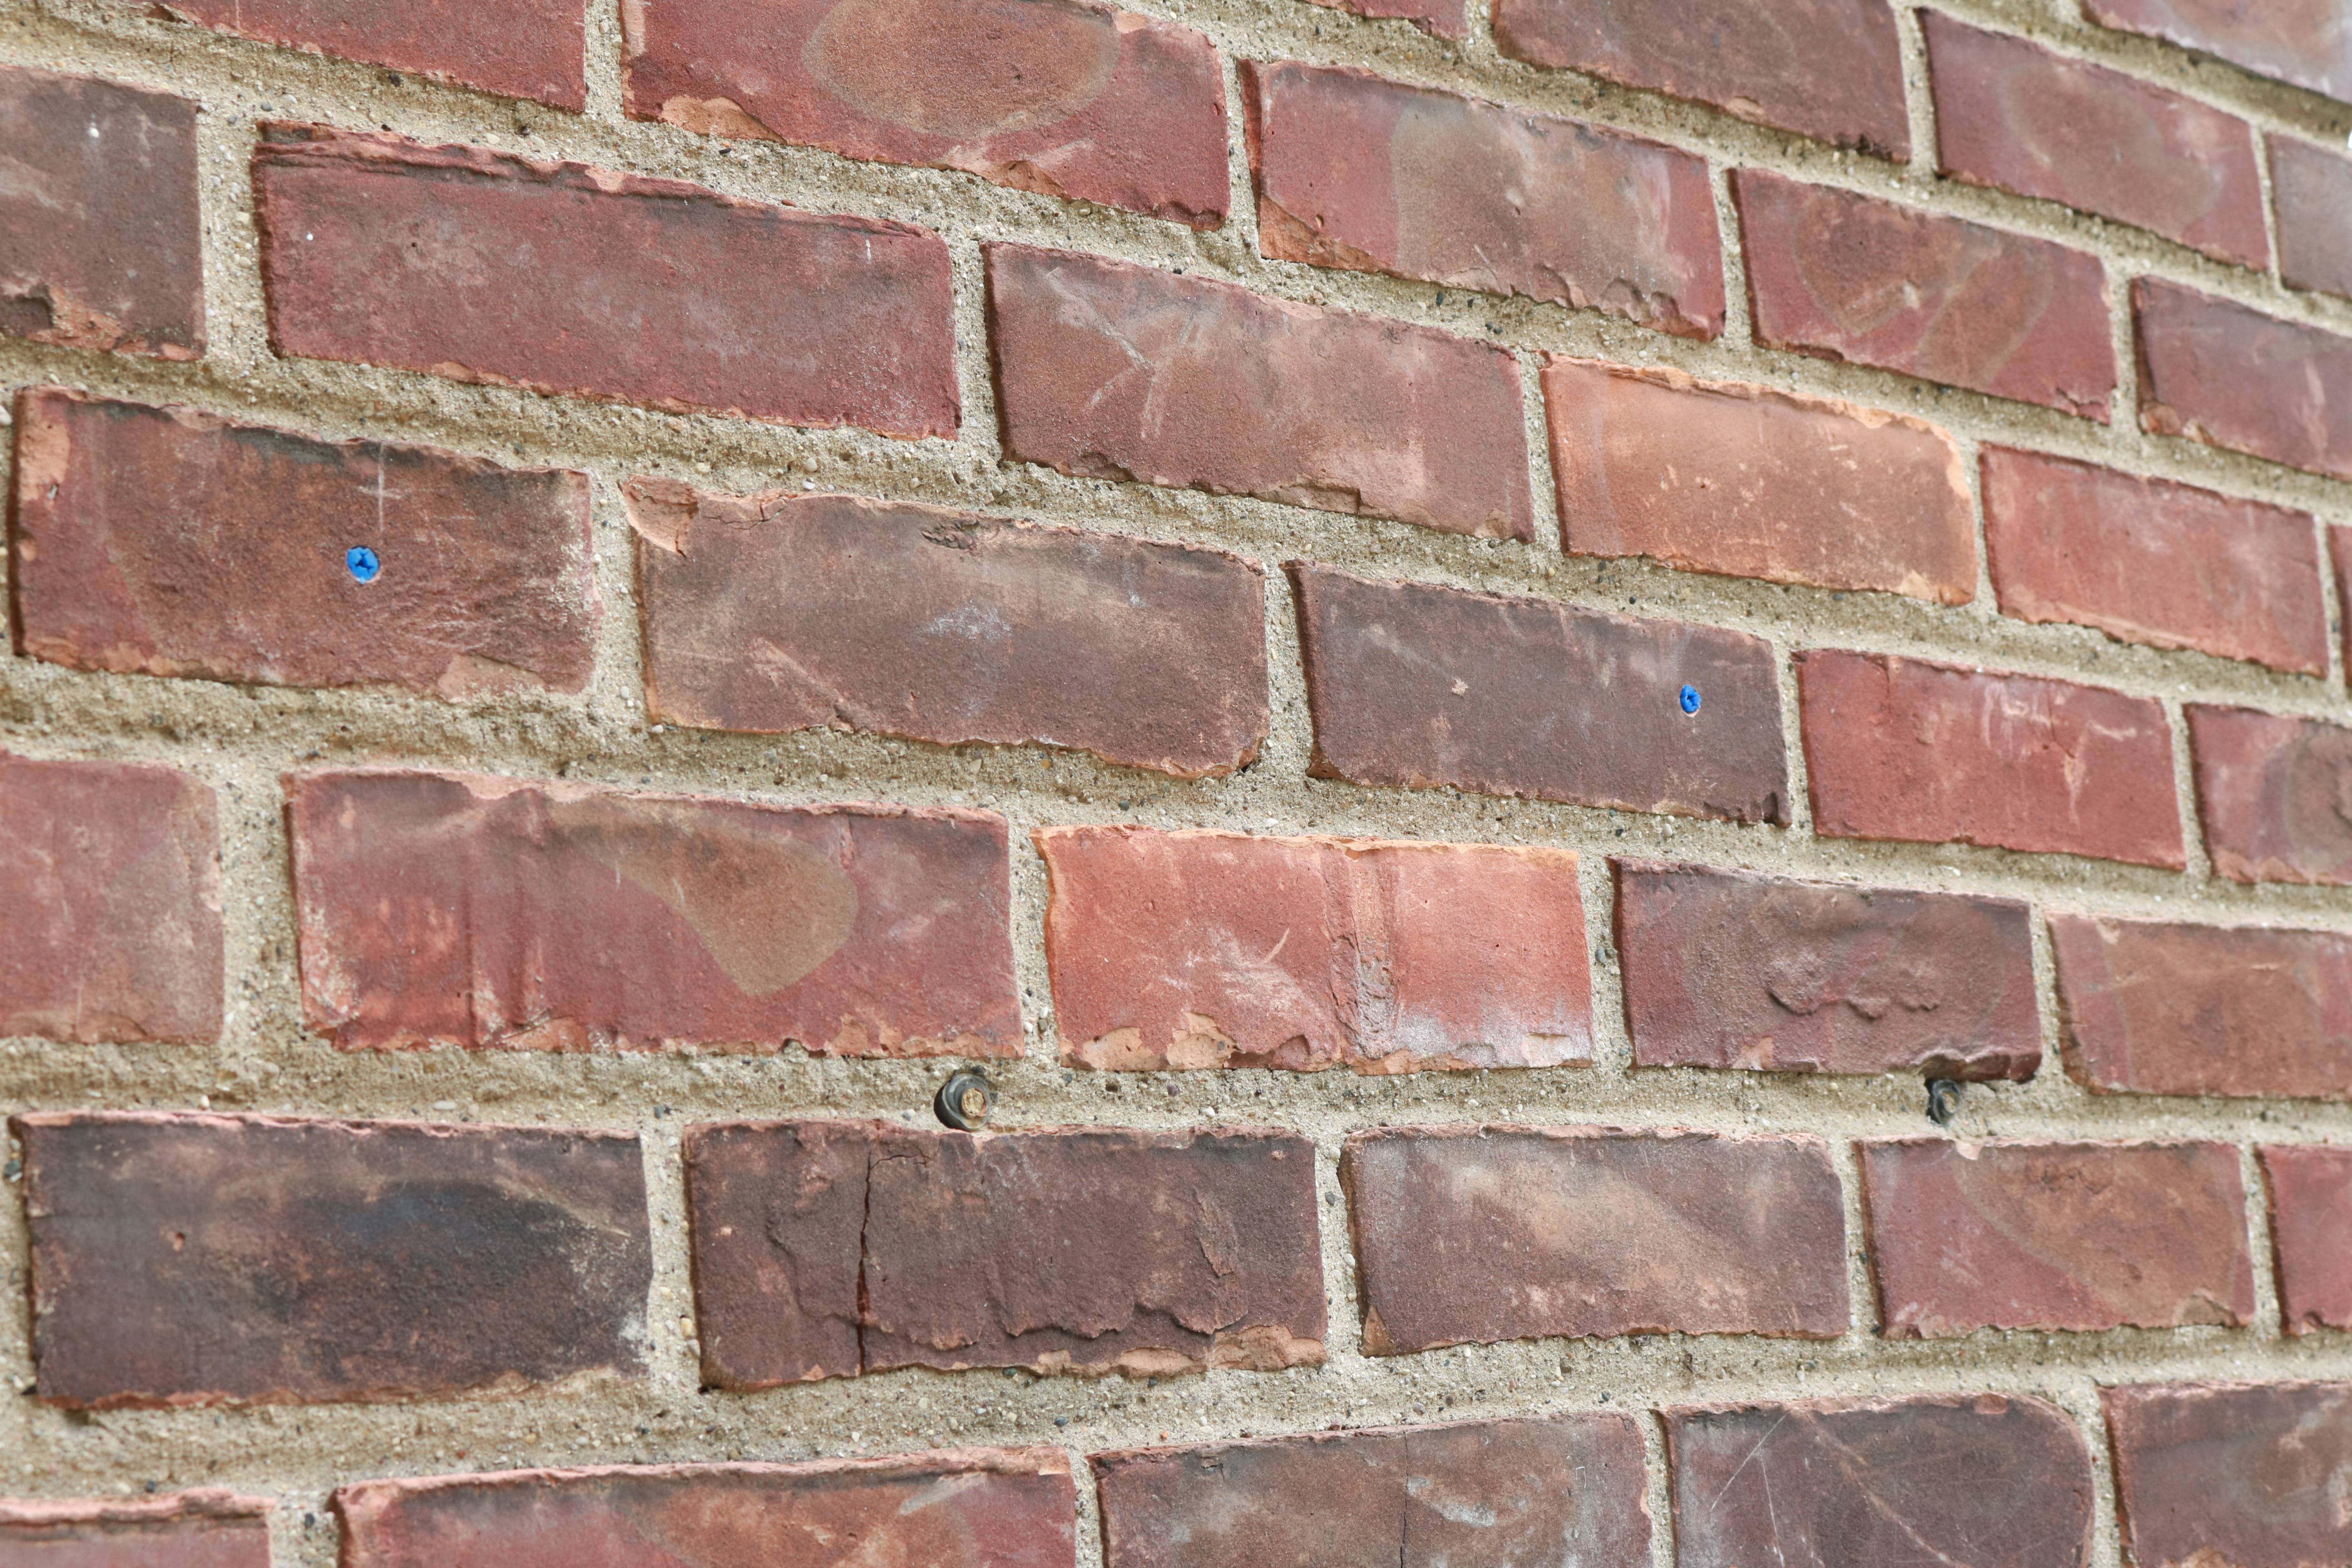
3. Drill a hole in the brick where you’ll want the top left corner to be and insert the anchor. Note: Drill right into the face of the brick, not the grout.
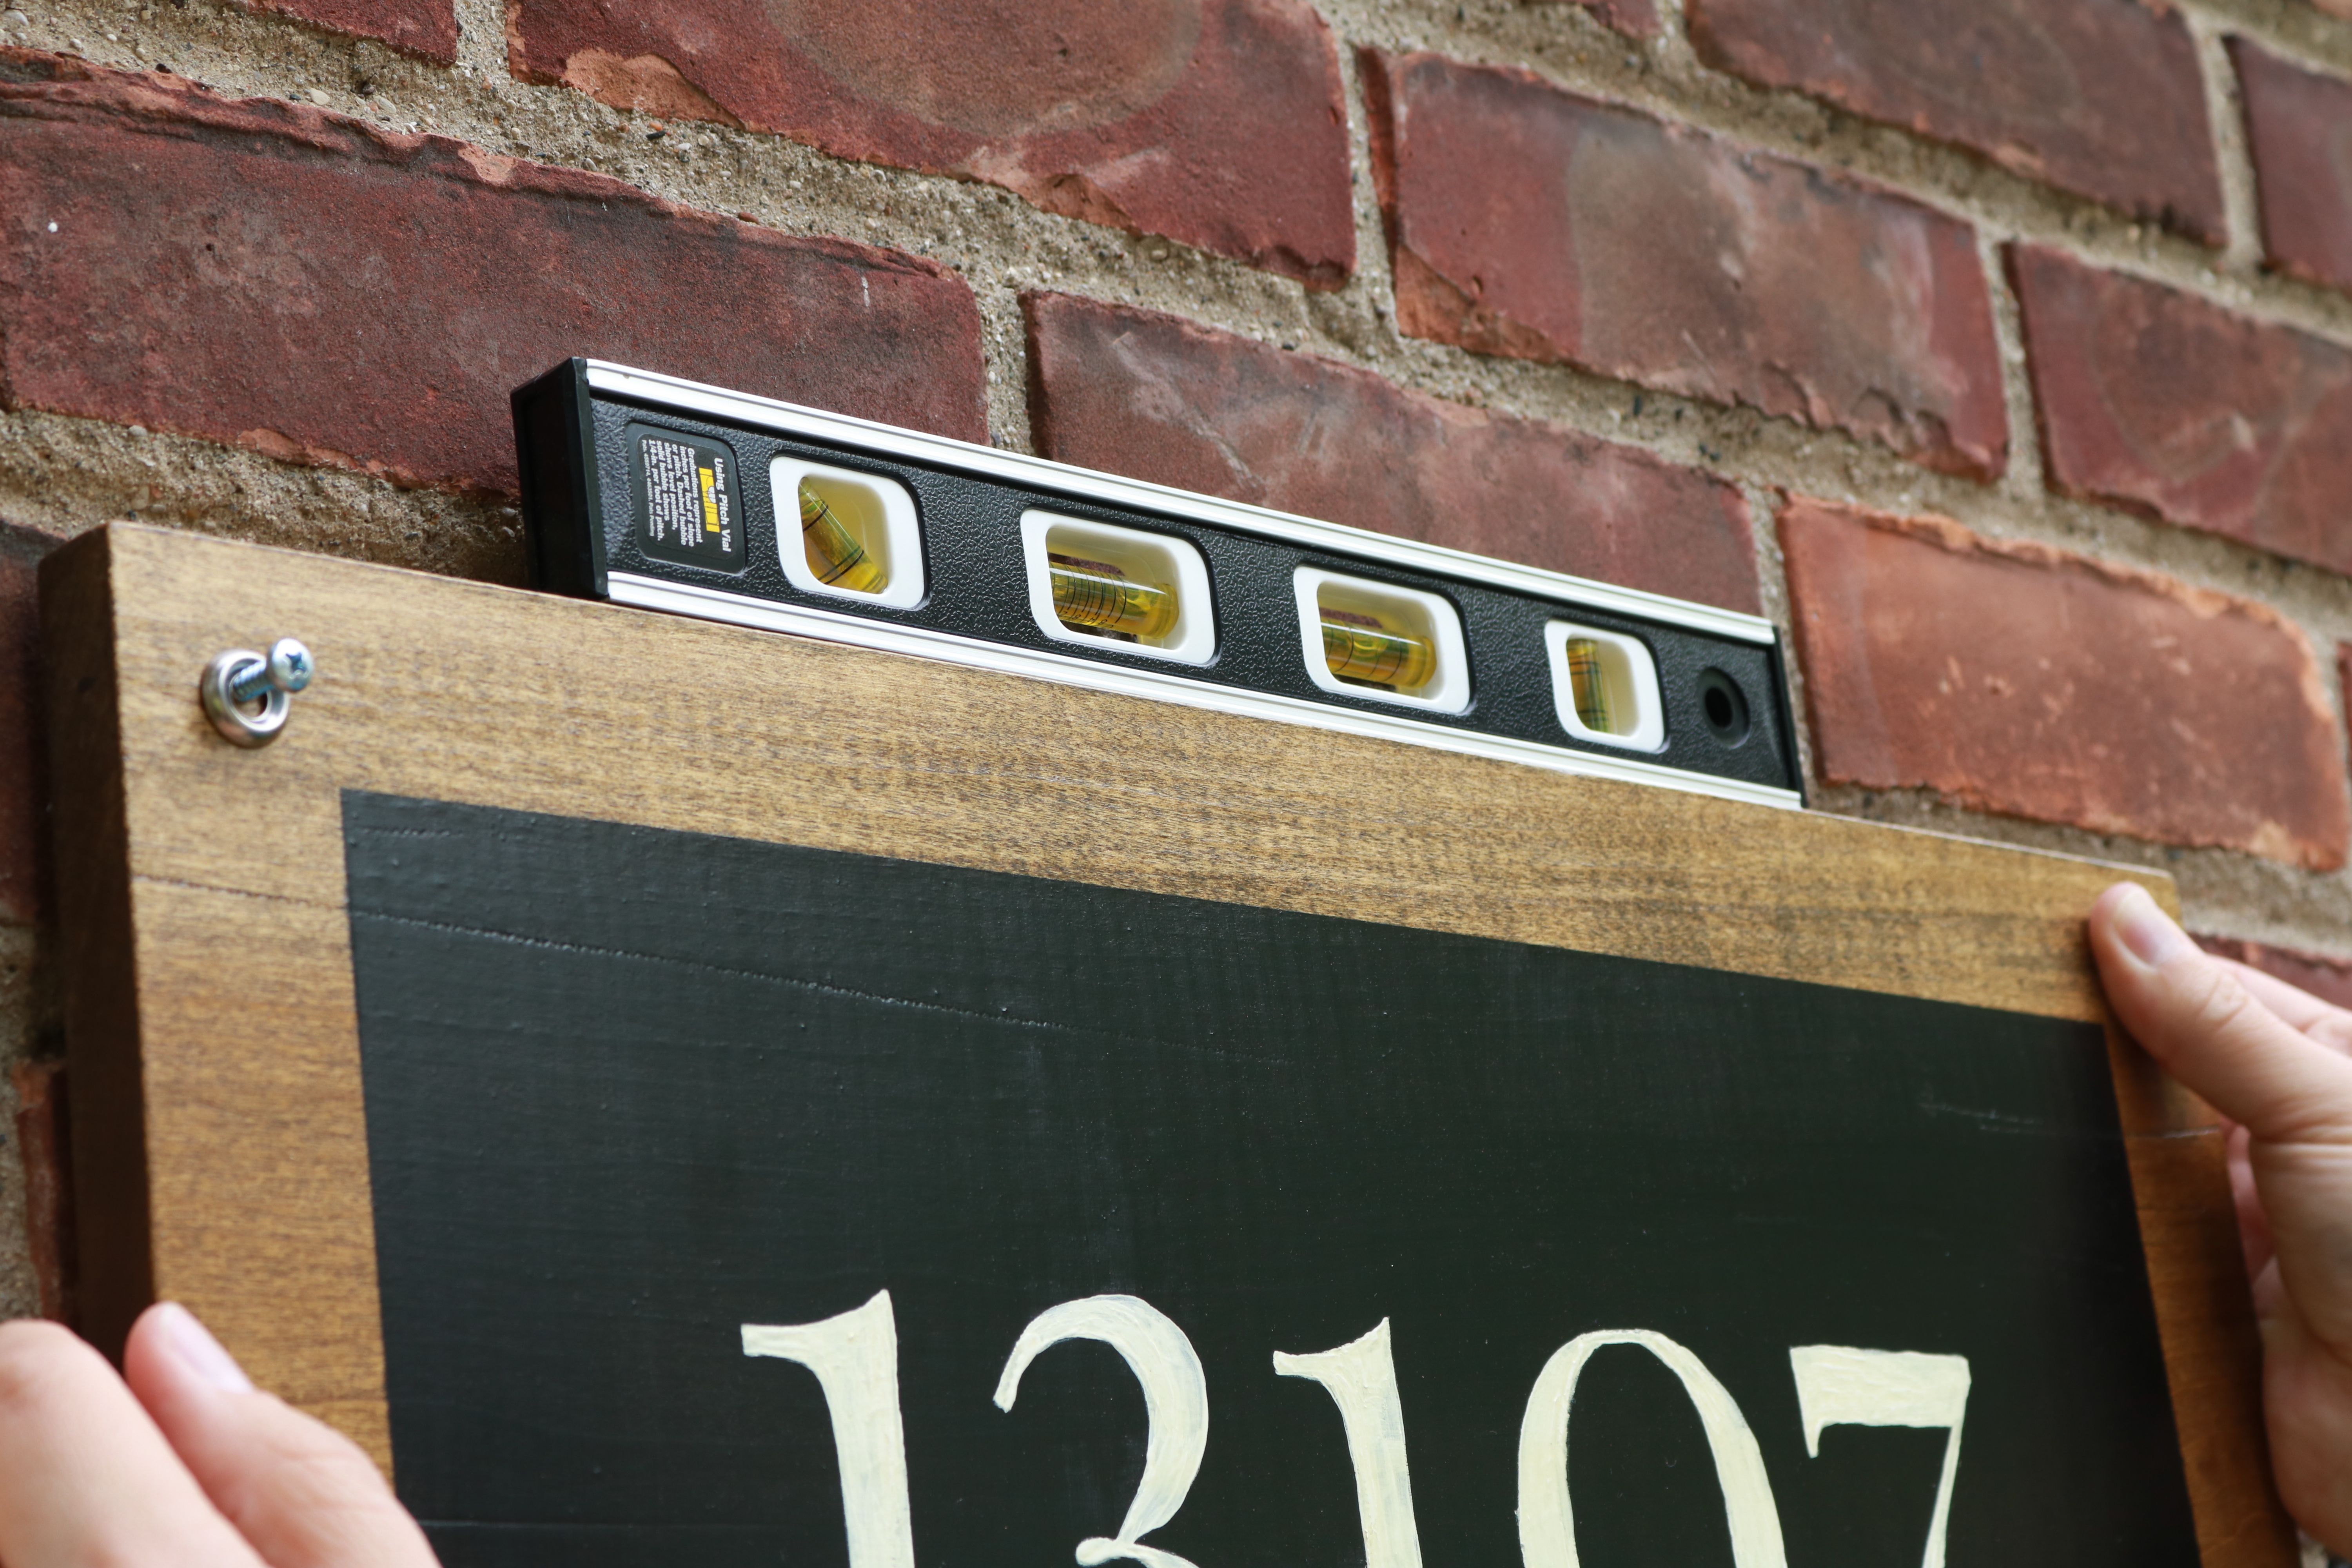
4. Use a level to find where the top right corner should attach. Put a screw through the top right corner and make a scratch in the brick.
5. Drill a hole where you left the scratch mark for the top right corner and insert an anchor. Repeat this step for the bottom two screws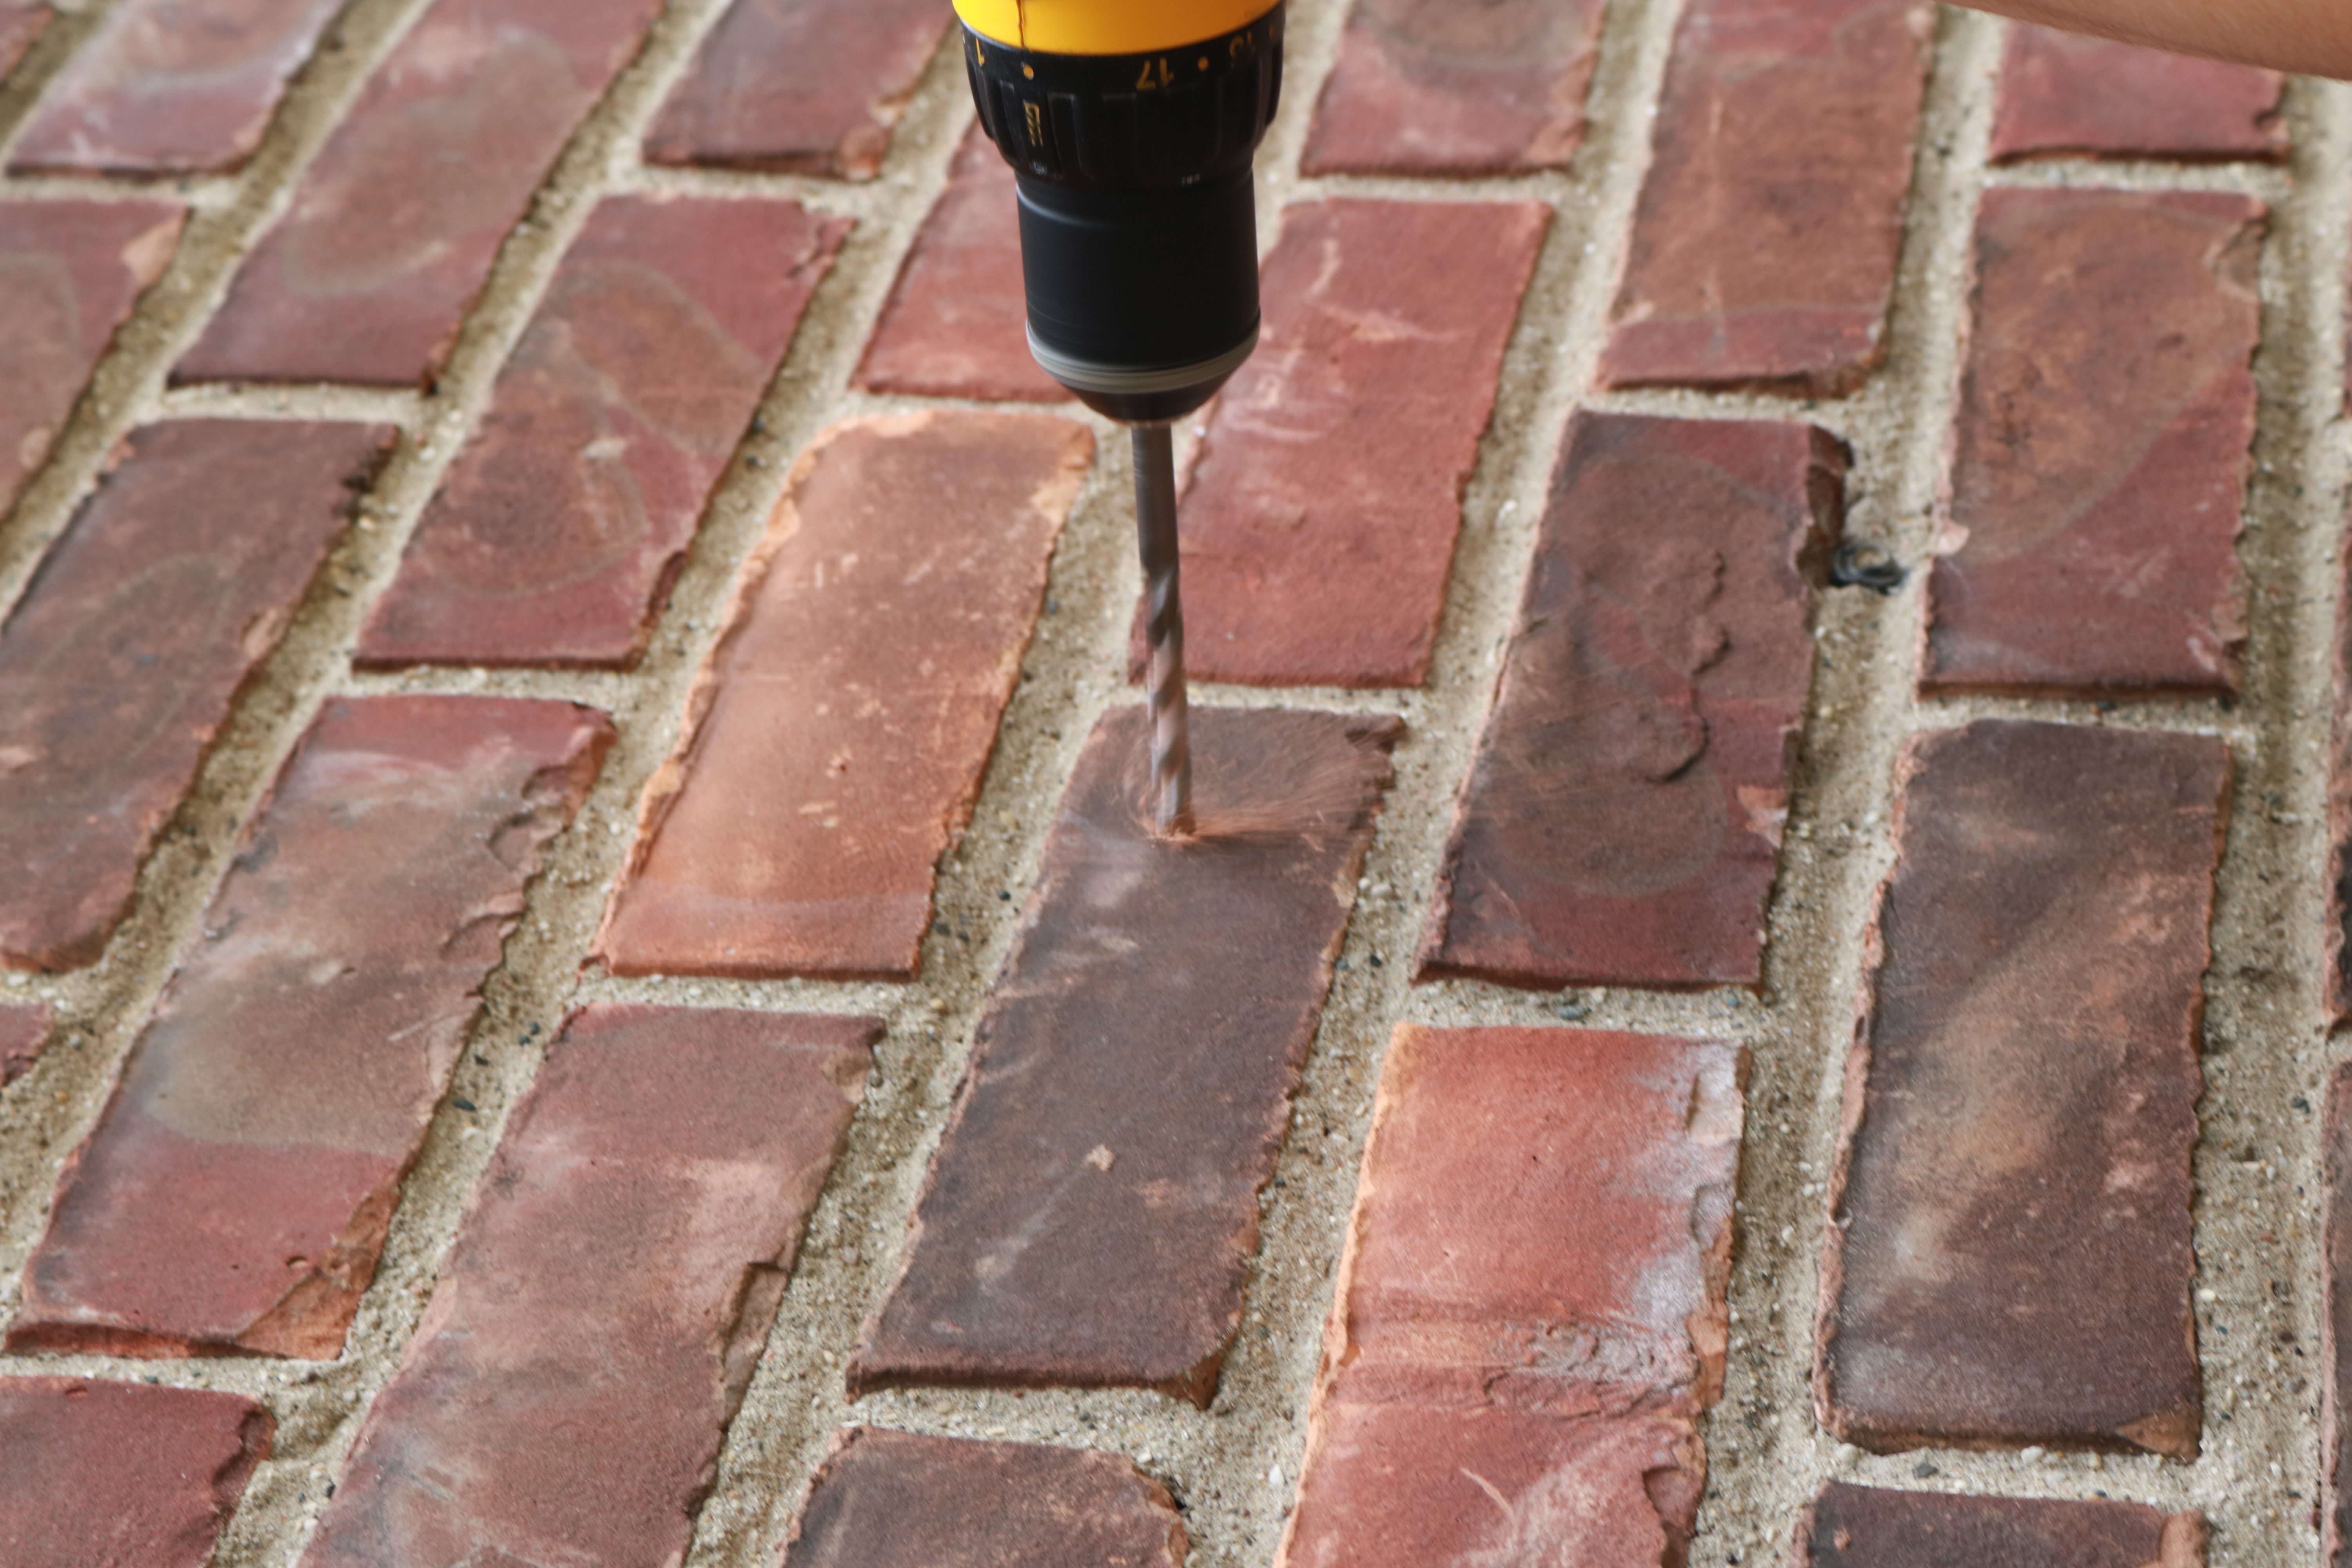
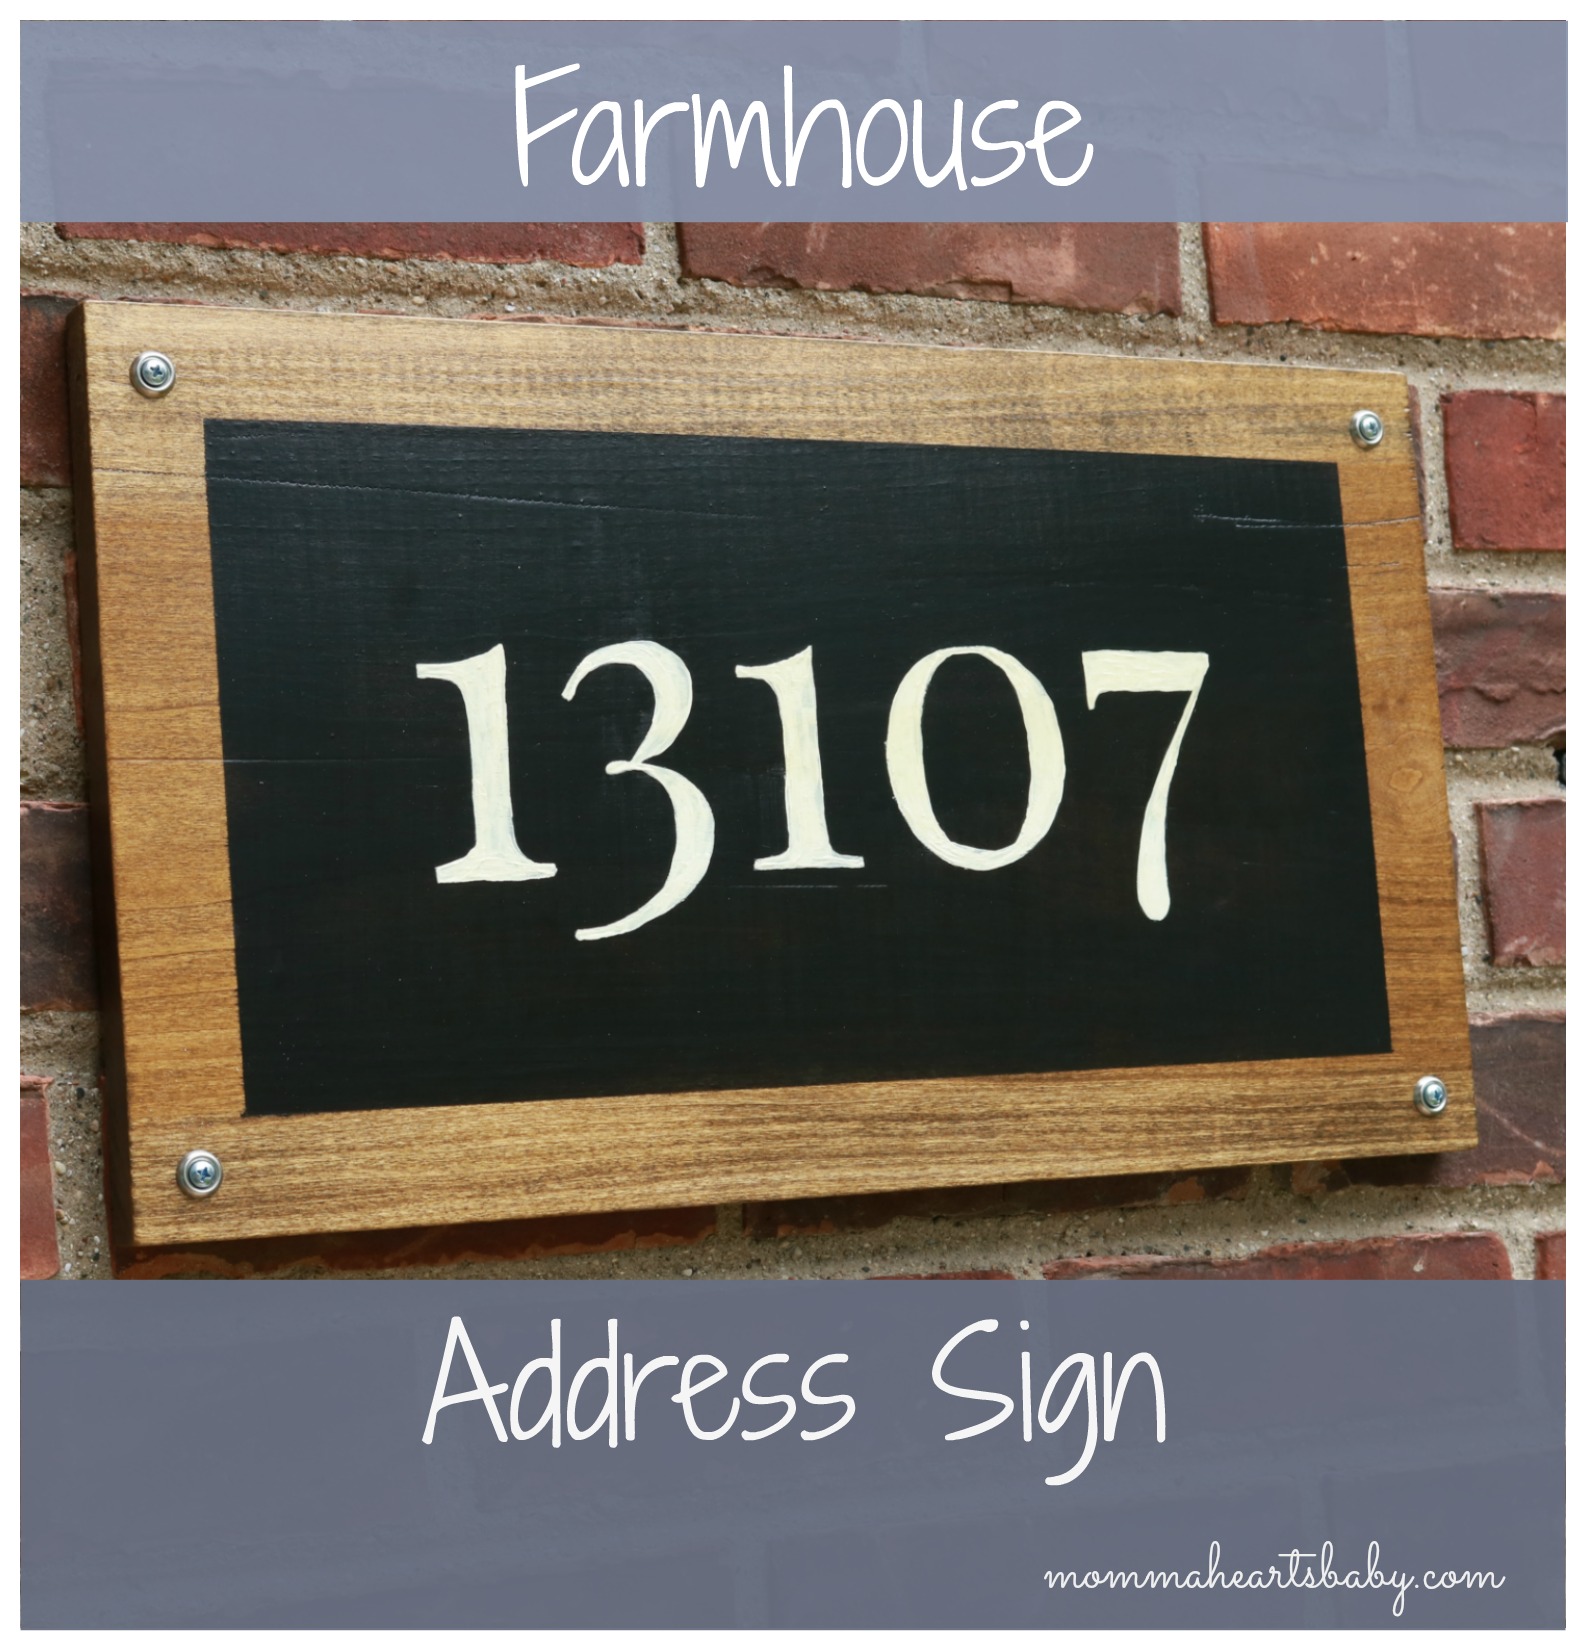
Once the sign is up it’ll look something like this:
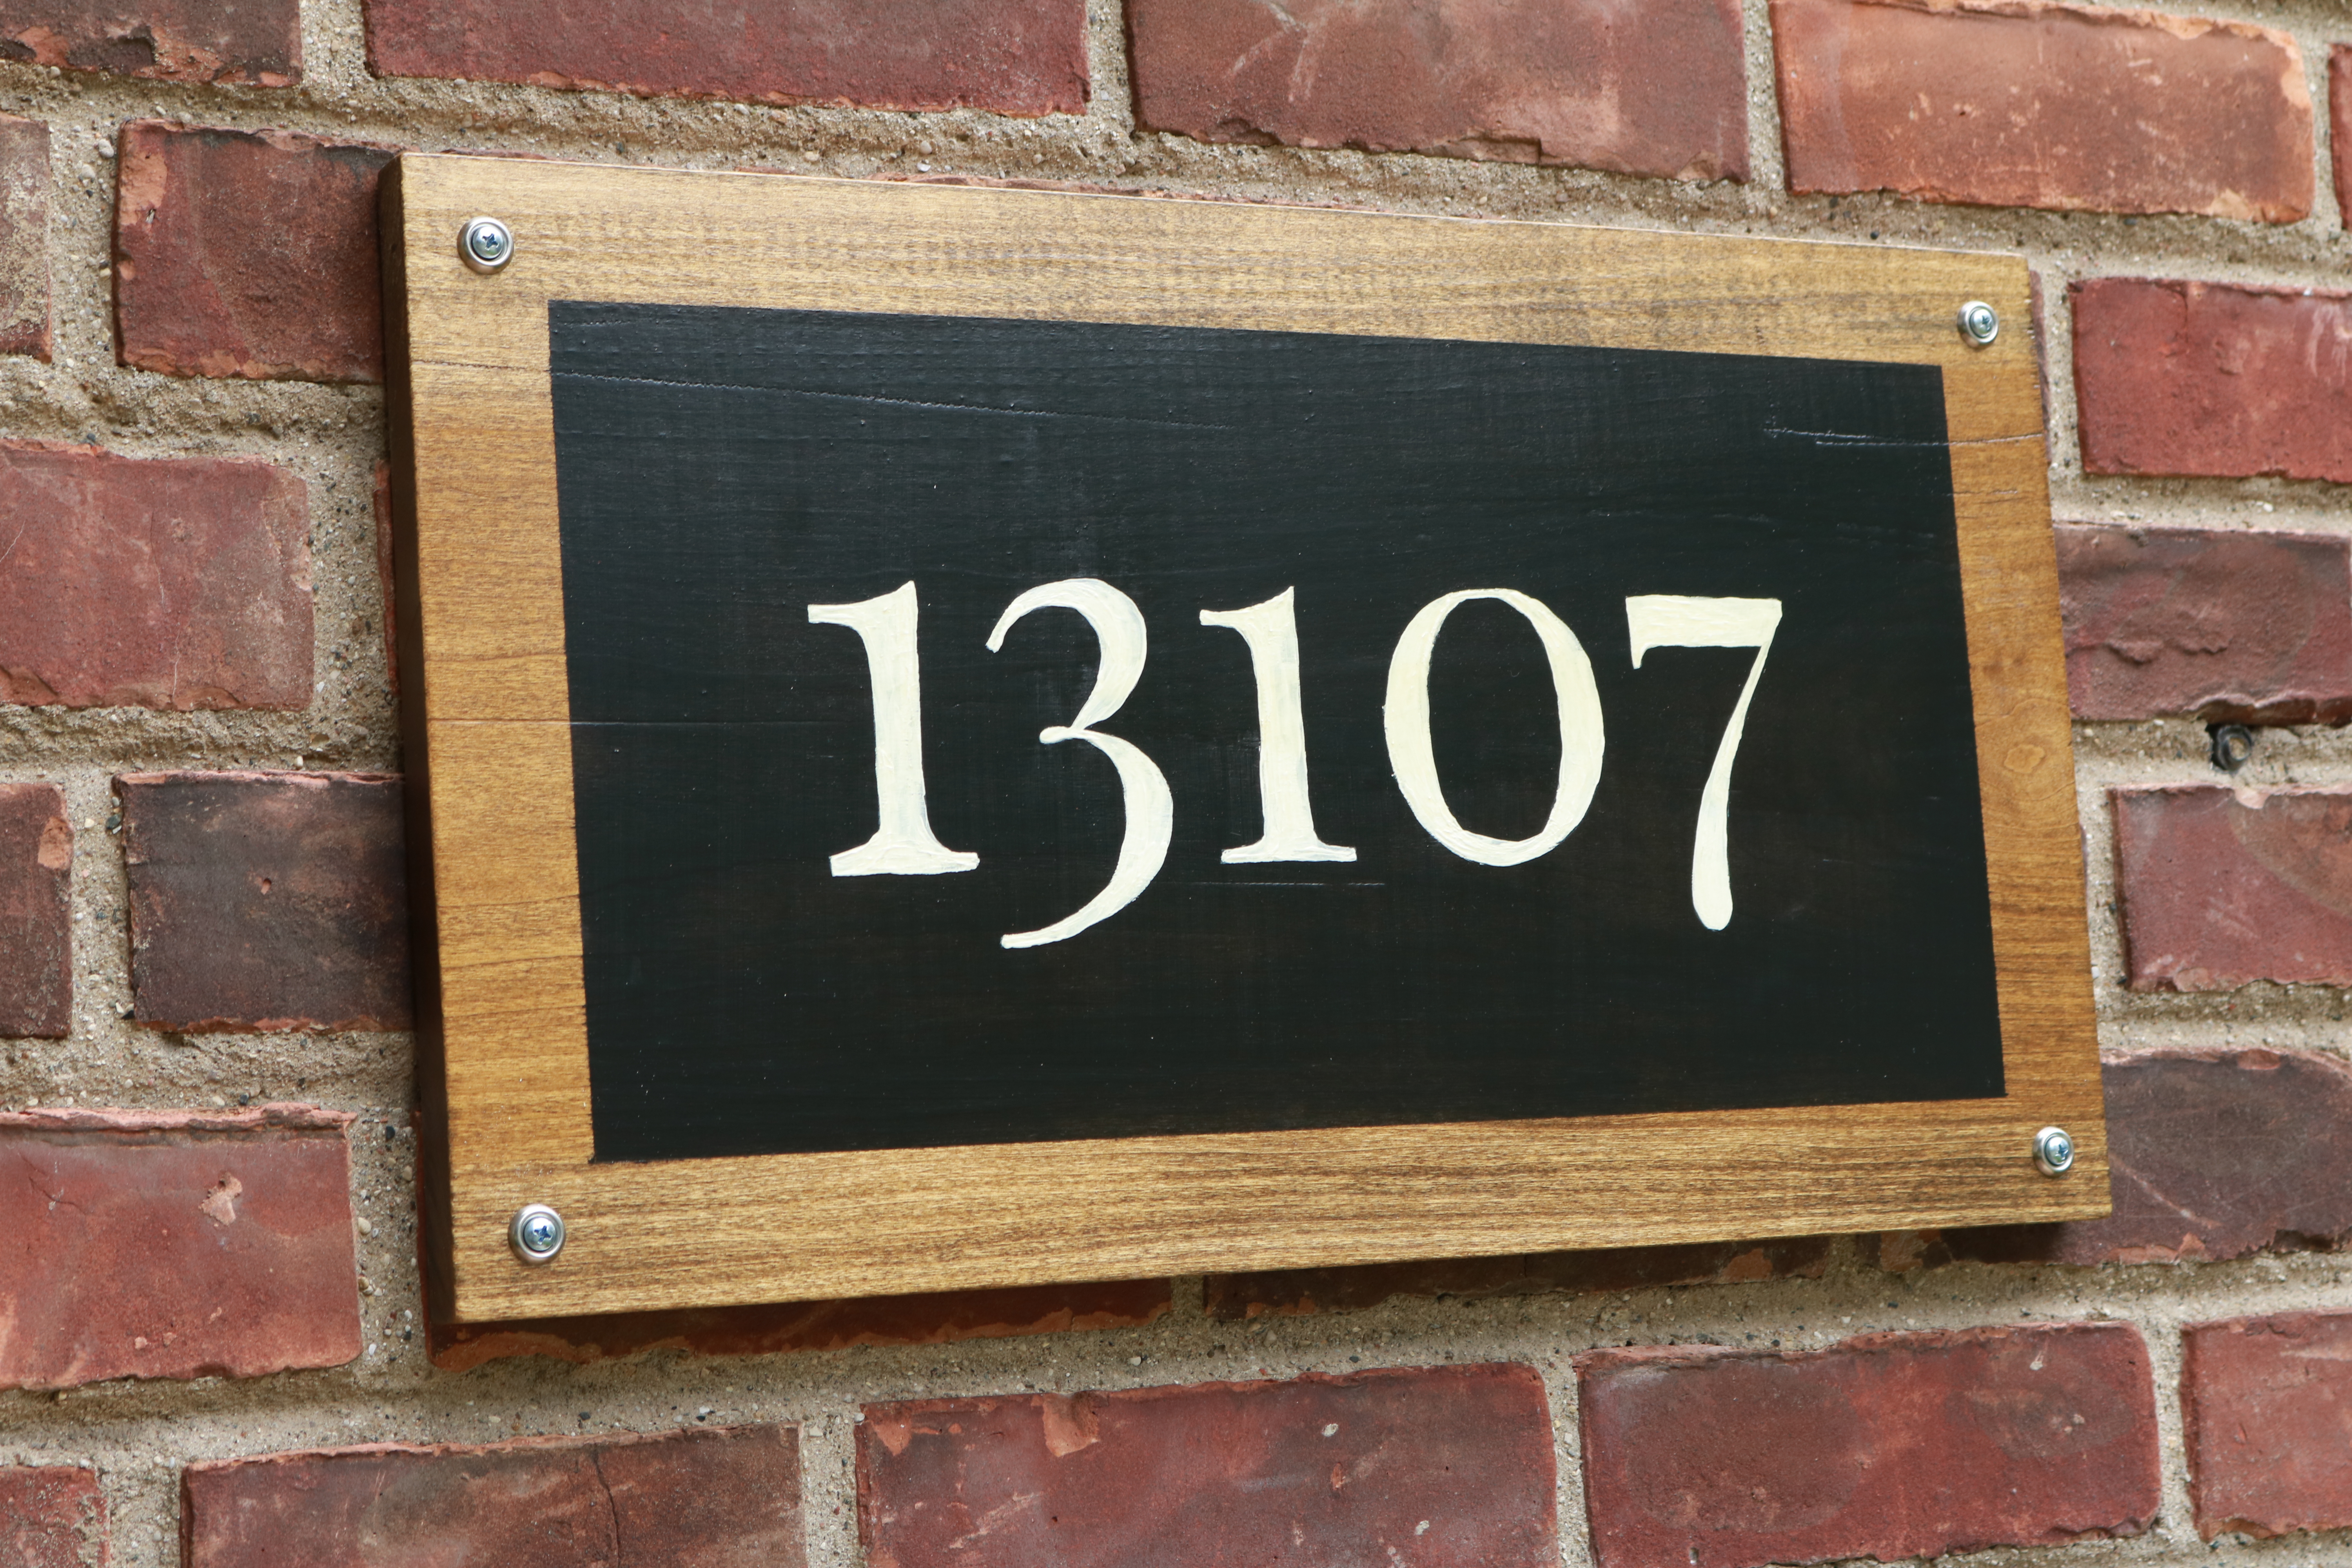
There were a lot of steps to this project but I found the most time consuming aspect was getting the paint and varnish to dry. I spread this project out over multiple days and worked on it during nap time. I like this sign because it’s unique and adds some farmhouse curb appeal. Do you have any suggestions for adding farmhouse curb appeal? If so, leave us a comment!

This is AWESOME! Going to try it this weekend 🙂
Thank you Sophia! I hope you enjoy it as much as I did!
I’m loving the look of this! So cute!
Thanks Bailie! I love this sign, it’s one of my favorites!
This is SO CUTE! Thanks for walking us through it. Saving this for a future project :).
Thanks Sara! I hope you’ll try it and love it too!
This is adorable! So creative!
Thanks Clare!!
I cannot wait to make one! You make it look so simple 🙂
Thank you Dawn! It’s easy! I hope you enjoy your sign!
So cool! And looks hard but is actually quite easy 🙂
It is easy! And once you get the hang of it, you can make so many different signs!